Quantcast
Channel: Developer's Manual
Viewing all 251 articles
Browse latest View live

Transaction :: Version10.2

$
0
0


CnPAPI.Engine.Request.Order.Transaction

Elements:

  • TransactionType
  • DynamicDescriptor
  • Recurring
  • CurrentTotals
  • CouponCode
  • TransactionDiscount
  • TransactionTax
  • TransactionConvenienceFee
  • ChargeDate
  • CustomParameters
  • ReferenceTransaction
  • GiftCardList

Schema

  <xsd:element name="Transaction">

            <xsd:complexType>

                  <xsd:sequence>

                        <xsd:element ref="TransactionType" minOccurs="0"/>       

                        <xsd:element ref="DynamicDescriptor" minOccurs="0"/>

                        <xsd:element ref="Recurring" minOccurs="0"/>

                        <xsd:element ref="CurrentTotals" minOccurs="0"/>       

                        <xsd:element ref="CouponCode" minOccurs="0"/>

                        <xsd:element ref="TransactionDiscount" minOccurs="0"/>

                        <xsd:element ref="TransactionTax" minOccurs="0"/>

                        <xsd:element ref="TransactionConvenienceFee" minOccurs="0"/>

                        <xsd:element ref="ChargeDate" minOccurs="0"/>

                        <xsd:element ref="CustomParameters" minOccurs="0"/>

                        <xsd:element ref="ReferenceTransaction" minOccurs="0"/>

                        <xsd:element ref="GiftCardList" minOccurs="0"/>       

                  </xsd:sequence>

            </xsd:complexType>

      </xsd:element>

Example

 <Transaction>

            <TransactionType>Authorize</TransactionType>

            <DynamicDescriptor>DynamicDescriptor | Phone</DynamicDescriptor>

            <Recurring>

                        <Installment>2</Installment>

                        <Periodicity>2 Months</Periodicity>

            </Recurring>

            <CurrentTotals>

                        <TotalDiscount>800</TotalDiscount>

                        <TotalTax>900</TotalTax>

                        <TotalShipping>500</TotalShipping>

                        <TotalDeductible>700</TotalDeductible>

                        <Total>4600</Total>

            </CurrentTotals>

 </Transaction>

TransactionType

Name  

TransactionType  

Path  

CnPAPI.Engine.Request.Order.Transaction.TransactionType  

Description  

The type of transaction this order represents.  

Data Type  

String  

Range  

Authorize: Transaction will not settle and will need to be settled manually.  

Payment: Transaction posted as settled and is final.  

Default  


Operation  

Transaction Operation only  

Input/output  

Input  

Version/Release  

1.2  

Required  

Yes  

Example  

<TransactionType>Payment</TransactionType>  

Schema

            <xsd:element name="TransactionType">

                        <xsd:simpleType>

                                    <xsd:annotation>

                                                <xsd:documentation>The type of transaction this order represents.</xsd:documentation>

                                    </xsd:annotation>

                                    <xsd:restriction base="xsd:string">

                                                <xsd:enumeration value="Authorize"/>

                                                <xsd:enumeration value="Payment"/>

  <xsd:enumeration value="PreAuthorization"/>

                                    </xsd:restriction>

                        </xsd:simpleType>
            </
xsd:element>

DynamicDescriptor

Name  

DynamicDescriptor  

Path  

CnPAPI.Engine.Request.Order.Transaction.DynamicDescriptor  

Description  

The name that appears on the card holder’s statement.  

Data Type  

Minimum: blank

Maximum: 39 characters  

Range  

Maximum 39characters  

Default  


Operation  

Transaction Operation only  

Input/output  

Input  

Version/Release  

1.2  

Required  

It is required only for In-house account. Ignored for the merchant accounts.  

Example  

<DynamicDescriptor>Campaign of VA | 5409619811</DynamicDescriptor>  

IMPORTANT POINT:

The dynamic descriptor has to include the phone number where a card holder may contact the organization. It has to be similar to the example provided.

Schema

            <xsd:element name="DynamicDescriptor">

                        <xsd:simpleType>

                                    <xsd:annotation>

                                                <xsd:documentation>The name that appears on the card holder’s statement.</xsd:documentation>

                                    </xsd:annotation>

                                    <xsd:restriction base="xsd:string">

                                                <xsd:maxLength value="39"/>

                                    </xsd:restriction>

                        </xsd:simpleType>
            </
xsd:element>

Recurring

CnPAPI.Engine.Request.Order.Transaction.Recurring

Elements:

Schema

            <xsd:element name="Recurring">

                        <xsd:complexType>

                                    <xsd:sequence>

                                                <xsd:element ref="Installment" minOccurs="0"/>

                                                <xsd:element ref="EndDate" minOccurs="0"/>

                                                <xsd:element ref="Periodicity"/>

                                                <xsd:element ref="RecurringMethod" minOccurs="0"/>

                                    </xsd:sequence>

                        </xsd:complexType>
            </
xsd:element>

Example

 <Recurring>

  <Installment>2</Installment>

  <Periodicity>2 Months</Periodicity>

 </Recurring>

Installment

CnPAPI.Engine.Request.Order.Transaction.Recurring.Installment 

Name  

Installment  

Path  

CnPAPI.Engine.Request.Order.Transaction.Recurring.Installment  

Description  

The number of times a payment will be replicated.  

Data Type  

Int16  

Range  

Minimum: 2  

Maximum: 999  

Default  


Operation  

Transaction Operation only  

Input/output  

Input  

Version/Release  

1.2  

Required  

No  

Example  

<Installment>6</Installment>  

Schema

            <xsd:element name="Installment">

                        <xsd:simpleType>

                                    <xsd:annotation>

                                                <xsd:documentation>The number of periods the transaction should be repeated.</xsd:documentation>

                                    </xsd:annotation>

                                    <xsd:restriction base="xsd:integer">

                                                <xsd:minInclusive value="2"/>

                                                <xsd:maxInclusive value="999"/>

                                    </xsd:restriction>

                        </xsd:simpleType>
            </
xsd:element>

EndDate

CnPAPI.Engine.Request.Order.Transaction.Recurring.EndDate  

Name  

EndDate  

Path  

CnPAPI.Engine.Request.Order.Transaction.Recurring.EndDate  

Description  

The date when the recurring payments should end.  

Data Type  

String  

Range  

dd/mm/yy  

Default  


Operation  

Transaction Operation only  

Input/output  

Input  

Version/Release  

2.90  

Required  

No [optional – ignored if Installment is used. Use in place of periodicity.  

Example  

<EndDate>15/01/09</EndDate>  

Schema

            <xsd:element name="EndDate">

                        <xsd:simpleType>

                                    <xsd:annotation>

                                                <xsd:documentation>yy/mm/dd</xsd:documentation>

                                    </xsd:annotation>

                                    <xsd:restriction base="xsd:string">

                                                <xsd:pattern value="[0-9][0-9]/[0-9][0-9]/[0-9][0-9]"/>

                                    </xsd:restriction>

                        </xsd:simpleType>
            </
xsd:element>

Periodicity

CnPAPI.Engine.Request.Order.Transaction.Recurring.Periodicity 

Name  

Periodicity   

Path  

CnPAPI.Engine.Request.Order.Transaction.Recurring.Periodicity  

Description  

The period for the recurring transaction. After the first transaction, all subsequent charges will occur with this period. Credit card expiration date will be checked for validity based on the period and installments.  

Data Type  

String  

Range  

It must be one of the following  

Week

2 Weeks  

Month  

2 Months  

Quarter  

6 Months  

Year  

Default  


Operation  

Transaction Operation only  

Input/output  

Input  

Version/Release  

1.2  

Required  

No. Use either periodicity or EndDate when posting recurring transaction.  

Example  

<Periodicity>2 Months</Periodicity>  

Schema

            <xsd:element name="Periodicity">

                        <xsd:simpleType>

                                    <xsd:annotation>

                                                <xsd:documentation>The period for the recurring transaction.  After the first transaction, all subsequent charges will occur with this period.  Credit card expiration date will be checked for validity based on the period and installments.</xsd:documentation>

                                    </xsd:annotation>

                                    <xsd:restriction base="xsd:string">

                                             <xsd:enumeration value="Week"/>

                                             <xsd:enumeration value="2 Weeks"/>

                                                <xsd:enumeration value="Month"/>

                                                <xsd:enumeration value="2 Months"/>

                                                <xsd:enumeration value="Quarter"/>

                                                <xsd:enumeration value="6 Months"/>

                                                <xsd:enumeration value="Year"/>

                                    </xsd:restriction>

                        </xsd:simpleType>

            </xsd:element>

RecurringMethod

CnPAPI.Engine.Request.Order.Transaction.Recurring.RecurringMethod 

Name  

RecurringMethod

Path  

CnPAPI.Engine.Request.Order.Transaction.Recurring.RecurringMethod

Description  

The recurring method used.  The value will ONLY be used for reporting.

Data Type  

String  

Range  

It must be one of the following 

  • Installment
  • Subscription

Default  


Operation  

Transaction Operation only  

Input/output  

Input  

Version/Release  

2.24

Required  

No.  - value is only used in the report

Example  

<RecurringMethod>Subscription</RecurringMethod>  

Schema

            <xsd:element name="RecurringMethod">

                        <xsd:simpleType>

                                    <xsd:annotation>

                                                <xsd:documentation></xsd:documentation>

                                    </xsd:annotation>

                                    <xsd:restriction base="xsd:string">

                                                <xsd:enumeration value="Installment"/>

                                                <xsd:enumeration value="Subscription"/>

                                    </xsd:restriction>

                        </xsd:simpleType>

            </xsd:element>

CurrentTotals

 CnPAPI.Engine.Request.Order.Transaction.CurrentTotals

Elements:

  • TotalDiscount
  • TotalTax
  • TotalShipping
  • TotalDeductible
  • Total


Schema

      <xsd:element name="CurrentTotals">

            <xsd:complexType>

                  <xsd:sequence>

                        <xsd:element ref="TotalDiscount" minOccurs="0"/>

                        <xsd:element ref="TotalTax" minOccurs="0"/>

                        <xsd:element ref="TotalShipping" minOccurs="0"/>

                        <xsd:element ref="TotalDeductible" minOccurs="0"/>

                        <xsd:element ref="Total"/>

                  </xsd:sequence>

            </xsd:complexType>

      </xsd:element>

TotalDiscount

CnPAPI.Engine.Request.Order.Transaction.CurrentTotals.TotalDiscount

Name  

TotalDiscount

Path  

CnPAPI.Engine.Request.Order.Transaction.CurrentTotals.TotalDiscount

Description  

Sum of all individual discounts applied for each item in the list.

Data Type  

long  

Range  

Min: 0

Max: 9999999999

Default  


Operation  

Transaction Operation only  

Input/output  

Input  

Version/Release  

1.20

Required  

No

Example  

<TotalDiscount>1000</ TotalDiscount >  

Schema

      <xsd:element name="TotalDiscount">

            <xsd:simpleType>

                  <xsd:annotation>

                        <xsd:documentation>Total discount applied to the order</xsd:documentation>

                  </xsd:annotation>

                  <xsd:restriction base="xsd:long">

                        <xsd:minInclusive value="0"/>

                        <xsd:maxInclusive value="9999999999"/>

                  </xsd:restriction>

            </xsd:simpleType>

     </xsd:element>

TotalTax

CnPAPI.Engine.Request.Order.Transaction.CurrentTotals.TotalTax

Name  

TotalTax

Path  

CnPAPI.Engine.Request.Order.Transaction.CurrentTotals.TotalTax

Description  

Total tax applied to the transaction

Data Type  

long  

Range  

Min: 0

Max: 9999999999

Default  


Operation  

Transaction Operation only  

Input/output  

Input  

Version/Release  

1.20

Required  

No

Example  

<TotalTax>1000</TotalTax >  

Schema

      <xsd:element name="TotalTax">

            <xsd:simpleType>

                  <xsd:annotation>

                        <xsd:documentation>Total tax for the order</xsd:documentation>

                  </xsd:annotation>

                  <xsd:restriction base="xsd:long">

                        <xsd:minInclusive value="0"/>

                        <xsd:maxInclusive value="9999999999"/>

                  </xsd:restriction>

            </xsd:simpleType>

     </xsd:element>

TotalShipping

CnPAPI.Engine.Request.Order.Transaction.CurrentTotals.TotalShipping

Name  

TotalShipping

Path  

CnPAPI.Engine.Request.Order.Transaction.CurrentTotals.TotalShipping

Description  

Total cost of shipping for the transaction

Data Type  

long  

Range  

Min: 0

Max: 9999999999

Default  


Operation  

Transaction Operation only  

Input/output  

Input  

Version/Release  

1.20

Required  

No.  - value is only used in the report

Example  

< TotalShipping>1000</TotalShipping>  

Schema

      <xsd:element name="TotalShipping">

            <xsd:simpleType>

                  <xsd:annotation>

                        <xsd:documentation>Total shipping cost for the order</xsd:documentation>

                  </xsd:annotation>

                  <xsd:restriction base="xsd:long">

                        <xsd:minInclusive value="0"/>

                        <xsd:maxInclusive value="9999999999"/>

                  </xsd:restriction>

            </xsd:simpleType>

     </xsd:element>

TotalDeductible

CnPAPI.Engine.Request.Order.Transaction.CurrentTotals.TotalDeductible

Name  

TotalDeductible

Path  

CnPAPI.Engine.Request.Order.Transaction.CurrentTotals.TotalDeductible

Description  

Total tax deductible portion for the transaction

Data Type  

long  

Range  

Min: 0

Max: 9999999999

Default  


Operation  

Transaction Operation only  

Input/output  

Input  

Version/Release  

1.20

Required  

No

Example  

<TotalDeductible>2500</TotalDeductible >  

Schema

      <xsd:element name="TotalDeductible">

            <xsd:simpleType>

                  <xsd:annotation>

                        <xsd:documentation>Total tax deductible portion of the order</xsd:documentation>

                  </xsd:annotation>

                  <xsd:restriction base="xsd:long">

                        <xsd:minInclusive value="0"/>

                        <xsd:maxInclusive value="9999999999"/>

                  </xsd:restriction>

            </xsd:simpleType>

     </xsd:element>

Total

CnPAPI.Engine.Request.Order.Transaction.CurrentTotals.Total

Name  

Total

Path  

CnPAPI.Engine.Request.Order.Transaction.CurrentTotals.Total

Description  

Total transaction amount

Data Type  

long  

Range  

Min: 0

Max: 9999999999

Default  


Operation  

Transaction Operation only  

Input/output  

Input  

Version/Release  

1.20

Required  

Yes

Example  

<Total>3500</Total >  

Schema

      <xsd:element name="Total">

            <xsd:simpleType>

                  <xsd:annotation>

                        <xsd:documentation>Total amount to be charged.</xsd:documentation>

                  </xsd:annotation>

                  <xsd:restriction base="xsd:long">

                        <xsd:minInclusive value="0"/>

                        <xsd:maxInclusive value="9999999999"/>

                  </xsd:restriction>

            </xsd:simpleType>

      </xsd:element>

CouponCode

Name  

CouponCode  

Path  

CnPAPI.Engine.Request.Order.Transaction.CouponCode  

Description  

The type of transaction this order represents.  

Data Type  

String  

Range  

Min:  0

Max: 50 characters  

Default  


Operation  

Transaction Operation only  

Input/output  

Input  

Version/Release  

2.32  

Required  

No  

Example  

<CouponCode>ABCDEF-500</CouponCode >  

Schema

            <xsd:element name="CouponCode">

                        <xsd:simpleType>

                                    <xsd:annotation>

                                                <xsd:documentation></xsd:documentation>

                                    </xsd:annotation>

                                    <xsd:restriction base="xsd:string">

                                                <xsd:maxLength value="50"/>

                                    </xsd:restriction>

                        </xsd:simpleType>

            </xsd:element>

TransactionDiscount

Name  

TransactionDiscount  

Path  

CnPAPI.Engine.Request.Order.Transaction.TransactionDiscount  

Description  

The type of transaction this order represents.  

Data Type  

long  

Range  

Min: 0
Max:  9999999999  

Default  


Operation  

Transaction Operation only  

Input/output  

Input  

Version/Release  

2.48  

Required  

No  

Example  

< TransactionDiscount>500</TransactionDiscount>

Schema

   <xsd:element name="TransactionDiscount">

    <xsd:simpleType>

      <xsd:annotation>

        <xsd:documentation>Total discount applied to the transaction</xsd:documentation>

      </xsd:annotation>

      <xsd:restriction base="xsd:long">

        <xsd:minInclusive value="0"/>

        <xsd:maxInclusive value="9999999999"/>

      </xsd:restriction>

    </xsd:simpleType>

  </xsd:element>

TransactionTax

Name  

TransactionTax  

Path  

CnPAPI.Engine.Request.Order.Transaction.TransactionTax  

Description  

Tax associated with the entire transaction 

Data Type  

long

Range  

Min: 0

Max:  9999999999  

Default  


Operation  

Transaction Operation only  

Input/output  

Input  

Version/Release  

2.48  

Required  

No  

Example  

<TransactionTax>123</ TransactionTax>

Schema

  <xsd:element name="TransactionTax">

    <xsd:simpleType>

      <xsd:annotation>

        <xsd:documentation>Total tax applied to the transaction</xsd:documentation>

      </xsd:annotation>

      <xsd:restriction base="xsd:long">

        <xsd:minInclusive value="0"/>

        <xsd:maxInclusive value="9999999999"/>

      </xsd:restriction>

    </xsd:simpleType>
  </
xsd:element>


TransactionConvenienceFee

Name  

TransactionConvenienceFee  

Path  

CnPAPI.Engine.Request.Order.Transaction.TransactionConvenienceFee  

Description  

Total convenience fee applied to the transaction 

Data Type  

long

Range  

Min: 0
Max:  9999999999  

Default  


Operation  

Transaction Operation only  

Input/output  

Input  

Version/Release  

2.50  

Required  

No  

Example  

<TransactionConvenienceFee>456</TransactionConvenienceFee>

Schema

  <xsd:element name="TransactionConvenienceFee">

    <xsd:simpleType>

      <xsd:annotation>

        <xsd:documentation>Total convenience fee applied to the transaction</xsd:documentation>

      </xsd:annotation>

      <xsd:restriction base="xsd:long">

        <xsd:minInclusive value="0"/>

        <xsd:maxInclusive value="9999999999"/>

      </xsd:restriction>

    </xsd:simpleType>

  </xsd:element

ChargeDate [Not Supported for ACH/eCheck]

Name  

ChargeDate  

Path  

CnPAPI.Engine.Request.Order.Transaction.ChargeDate  

Description  

The date the transaction should be processed. 

Data Type  

date

Range  

YY/MM/DD

Default  


Operation  

Transaction Operation only for Credit Cards.  eCheck/ACH not supported

Input/output  

Input  

Version/Release  

2.48  

Required  

No  

Example  

<ChargeDate>12/01/30</ChargeDate>

Schema

  <xsd:element name="ChargeDate">

    <xsd:simpleType>

      <xsd:annotation>

        <xsd:documentation>yy/mm/dd</xsd:documentation>

      </xsd:annotation>

      <xsd:restriction base="xsd:string">

        <xsd:pattern value="[0-9][0-9]/[0-9][0-9]/[0-9][0-9]"/>

      </xsd:restriction>

    </xsd:simpleType>

  </xsd:element>

ReferenceTransaction

CnPAPI.Engine.Request.Order.Transaction.ReferenceTransaction

Elements:

  • OrderNumber
  • VaultGUID


Schema

      <xsd:element name="ReferenceTransaction">

            <xsd:complexType>

                  <xsd:sequence>

                        <xsd:element ref="OrderNumber"/>

                        <xsd:element ref="VaultGUID"/>

                  </xsd:sequence>

            </xsd:complexType>
      </
xsd:element>

OrderNumber

Name  

OrderNumber  

Path  

CnPAPI.Engine.Request.Order.Transaction.ReferenceTransaction.OrderNumber

Description  

The order number for the previous transaction 

Data Type  

String

Range  

Max = 36 characters

Default  


Operation  

Transaction Operation only  

Input/output  

Input  

Version/Release  

2.48  

Required  

No  

Example  

< OrderNumber>123456</OrderNumber>  

Schema

      <xsd:element name="OrderNumber">

            <xsd:simpleType>

                  <xsd:annotation>

                        <xsd:documentation/>

                  </xsd:annotation>

                  <xsd:restriction base="xsd:normalizedString">

                        <xsd:maxLength value="36"/>

                  </xsd:restriction>

            </xsd:simpleType>
      </
xsd:element>

VaultGUID

Name  

VaultGUID  

Path  

CnPAPI.Engine.Request.Order.Transaction.ReferenceTransaction.VaultGUID

Description  

The VaultGUID for the previous transaction 

Data Type  

String

Range  

Max = 36 characters

Default  


Operation  

Transaction Operation only  

Input/output  

Input  

Version/Release  

2.48  

Required  

No  

Example  

<VaultGUID>ABCD1234EGFDF4444</VaultGUID>

Schema

      <xsd:element name="VaultGUID">

            <xsd:simpleType>

                  <xsd:annotation>

                        <xsd:documentation/>

                  </xsd:annotation>

                  <xsd:restriction base="xsd:normalizedString">

                        <xsd:length value="36"/>

                  </xsd:restriction>

            </xsd:simpleType>
      </
xsd:element>

GiftCardList

 CnPAPI.Engine.Request.Order.Transaction.GiftCardList

Elements:

  • GiftCard


Schema:

  <xsd:element name="GiftCardList">

    <xsd:complexType>

      <xsd:sequence>

        <xsd:element ref="GiftCard" maxOccurs="unbounded"/>

      </xsd:sequence>

    </xsd:complexType>

  </xsd:element>

GiftCard

 CnPAPI.Engine.Request.Order.Transaction.GiftCardList.GiftCard

Elements:

  • GiftCardCode
  • GiftCardAmount


Schema

  <xsd:element name="GiftCard">

    <xsd:complexType>

      <xsd:sequence>

        <xsd:element ref="GiftCardCode"/>

        <xsd:element ref="GiftCardAmount"/>

      </xsd:sequence>

    </xsd:complexType>

  </xsd:element>

GiftCardCode

Name  

GiftCardCode

Path  

CnPAPI.Engine.Request.Order.Transaction.GiftCardList.GiftCardCode

Description  

The code for the gift card discount card

Data Type  

String

Range  

Max = 50 characters

Default  


Operation  

Transaction Operation only  

Input/output  

Input

Version/Release  

2.48

Required  

No

Example  

<GiftCardCode>ABCDE123456</GiftCardCode>

Schema

  <xsd:element name="GiftCardCode">

    <xsd:simpleType>

      <xsd:annotation>

        <xsd:documentation>GiftCardCode</xsd:documentation>

      </xsd:annotation>

      <xsd:restriction base="xsd:string">

        <xsd:maxLength value="50"/>

      </xsd:restriction>

    </xsd:simpleType>

  </xsd:element>

GiftCardAmount

Name  

GiftCardAmount

Path  

CnPAPI.Engine.Request.Order.Transaction.GiftCardList.GiftCardAmount

Description  

The gift card’s discount amount

Data Type  

long

Range  

Min = 0
Max = 9999999999

Default  


Operation  

Transaction Operation only  

Input/output  

Input

Version/Release  

2.48

Required  

No

Example  

<GiftCardAmount>123</GiftCardAmount>

Schema

  <xsd:element name="GiftCardAmount">

    <xsd:simpleType>

      <xsd:annotation>

        <xsd:documentation></xsd:documentation>

      </xsd:annotation>

      <xsd:restriction base="xsd:long">

        <xsd:minInclusive value="0"/>

        <xsd:maxInclusive value="9999999999"/>

      </xsd:restriction>

    </xsd:simpleType>

  </xsd:element>


Release-Notes :: Version2.6

$
0
0

Release-Notes :: Version1.5

Release-Notes :: Version1.5

Installation :: Version5.2

$
0
0
The Latest Release is Click & Pledge Payment as a Service App Version 8.0. To Install:

Step 1: Install API Class Library

To install “Click & Pledge Payment-as-a-Service” version 8.0 or later package, “Click & Pledge PaaS Class Library" version 2.0 or later must be installed first. This application is available on the Salesforce App Exchange here:


After installing the “Click & Pledge PaaS Class Library" version 2.0 or later, you may then install the “Click & Pledge Payment-as-a-Service” version 8.0 or later packages successfully.

Step 2: Install Payment as a Service (PaaS) App release 8.0 or later


Approve Third-Party Access
Third-Party Access

During installation user needs to approve the ‘Third-Party Access’ by accepting the access permission, then continue the Installation.

Approve Package API Access

Approve Package API Access

Choose Security Level

Up to your organization to select the Security Level that best suits your needs.

Choose Security Level

Install Package

Install Package

Step 3: Activate Integration between Click & Pledge and Salesforce

For activation instructions go here: http://manual.clickandpledge.com/Salesforce-PaaS-Activation.html

Step 4: Follow Post Installation Instructions

Post Installation instructions for new installations of this application: http://manual.clickandpledge.com/Salesforce-PaaS-Post-Installation.html

Drupal :: Version4.3

$
0
0

Integration Click & Pledge Payment Gateway

Requirements: Drupal Installed and then install CiviCRM4.2+. Please find more details at http://wiki.civicrm.org/confluence/display/CRMDOC42/Drupal+Installation+Guide+for+CiviCRM+4.2+-+Drupal+7

For CiviCRM4.2.1+ versions:

Configure ‘CiviCRM Extensions Directory’ (Administrator->System Settings->Directories). And configure ‘Extension Resource URL’ (Administrator->System Settings->Resource URLs)

Note: The extensions directory should be system writable.

Download extension (Payment Processor) files from: https://github.com/ClickandPledge/drupal-civicrm

Unzip the downloaded file and Upload it manually to your ‘CiviCRM Extensions Directory’ which is set in (Administrator->System Settings->Directories).

Ex: if your ‘CiviCRM Extensions Directory’ is C:<Drupal path>/sites/default/files/civicrm/extensions, then upload unzipped  ‘com.clickandpledge.payment.clickandpledge’ folder to C:< Drupal path >/sites/default/files/civicrm/extensions folder.

Admin login:

User Login

Access the CiviCRM:

http://<your_drupal_home> ?q=civicrm/dashboard.
This will launch CiviCRM.

How to add Payment Processor?

Then go to Administrator->System Settings->Payment Processors

Payment processors

Then click on Add Payment Processor

There you will find ‘Click & Pledge’ in ‘Payment Processor Type’  dropdown menu. Select ‘Click & Pledge’. It will display following screen

New payment processor

Enter your Click & Pledge ‘Account ID’ and ‘API Account GUID’ in corresponding fields then click on 'Save.'

Note
: Your Click & Pledge ‘Account ID’ and ‘API Account GUID’ is available within the Click & Pledge portal:
  • Login to the Click & Pledge administrative portal: https://Portal.ClickandPledge.com
  • Click on Account Info
  • In Profile tab>API Information copy the information needed for the above screen.

How to use this for your needs?

For Events:

Click on Events->New Event

event type
Enter required details then click on ‘continue’ button. Then click on ‘Fees’ tab and it will display following screen. When you click on ‘Yes’ for ‘Paid Event’ option, then you can select currency from ‘Currency’ drop down , ‘Click & Pledge’ from ‘Payment Processor’ drop down and can enter other required information.
Fees

How to set up an event for registration?

Click on ‘Online Registration’ tab, check ‘Allow Online Registration?’ option, then enter online registration details like registration start and end dates.
If you select ‘Allow multiple registrations from the same email address?’  then you need to select ‘Profile for Additional Participants’ any profile of type ‘individual.’

online registration

How to test application?

After setting fees and online registration options, look for ‘Event Links’ button above the screen.

Event Links

From the list you can select ‘Online Registration (Test-drive)’ or ‘Online Registration (Live).’

How to add more currencies? (How to add more countries?)

Go to Administrator->Localization->Languages, Currencies, Locations
Locations

For Contributions

Click on Contributions->New Contribution Page
New Contribution Page

Enter required details then click on ‘Continue>>’ button. It will display following screen. Here you can select currency, Payment processor (see above How to add payment processor?) and can select other options like amount, etc.

Contribution links amounts

If you want, you can set other options like memberships, Receipt, Tell a Friend, etc.

How to test application?

After setting ‘Amounts’ option, click on ‘Contribution Links’  it will display links for testing application.

Configure Page

How to add Memberships?

Go to Administrator->CiviMember->Membership Types then click on ‘Add Membership Type’

Membership Types

From the screen you can enter name of membership, membership organization, etc.

New Membership Type

NOTE: ‘Membership Organizationmust exist as a CiviCRM Organization type contact.

Gravity-Forms :: Version2.9

$
0
0
References:
Support:  3rd Party Integrations are supported through the forum only.  Please post all your questions to: https://forums.clickandpledge.com/forumdisplay.php?f=78

Requirements: 
  • Gravity Forms requires a minimum of WordPress version 3.7+
  • MySQL 5
  • PHP 5
Setup:
  1. http://<your_wordpress_home>/wp-login.php
  2. Make sure that Gravity forms plugin installed and enabled (http://www.gravityhelp.com/documentation/page/Getting_Started)
  3. Download the Click & Pledge plugin through GitHub:  https://github.com/ClickandPledge/WordPress-GravityForms
  4. Copy Click & Pledge plugin (‘gravityforms-cnp’ folder) as downloaded in step 3 in the WordPress Plugin folder as outlined below:
  • <your host root>\wp-content\plugins\
  • Go to ‘plugins->Installed Plugins’ enable the ‘Gravity Forms Click & Pledge’
  • Enable Gravity Form / Click & Pledge
  • Click on ‘Forms->Settings->C&P Payments’ to enter Click & Pledge Credentials like ‘Account ID’, ‘API Account GUID’ and to setup other settings
  • Account ID, API GUID are located at the Click & Pledge administrative portal > Account Info > Profile > API

    Click & Pledge API Information

  • Please follow the documentation here to create a form http://www.gravityhelp.com/documentation/page/New_Form
  • Assigning From to process through Click & Pledge:
    • Click on ‘Forms->Click & Pledge’ to display all available forms.
    • Select the ‘Gravity Form’ to process then click on ‘Save’ button

    Setting SKU for an item:

    SKU's are added for each item and option as a hidden field.  The following example shows how to add SKU to a single item as well as one with options.

    Example 1:  T-Shirt with SKU=abc-123

    Item definition:

    Gravity Forms - T-Shirt

    Note:  In the above example the Field id for the item is shown as:  Field ID 2.

    Add a hidden field:

    GravityForms Hidden Fields

    Set up the hidden field referencing the Field ID as in the Product setting:

    Properties field label:  {SKU}{FIELDID=2} - Please note that all fields are case sensitive - SKU & FIELDID should be in all caps.

    Gravity Forms- T-Shirt- Properties

    The Advanced tab is the value of the SKU.
    Gravity Forms- T-Shirt- Advanced

    Example 2:

    For products with options such as those listed in a pull down menu or a radio button, each option needs to be set up with an SKU.  SKU's may be the same or different.

    Hidden field format:  {SKU}{FIELDID=fid}{OPTION=value}
    • fid = Field ID of the product as listed in the Product listing
    • value = Option's label - each option of a product has to be set up with a unique label and that label needs to be listed to identify the SKU's reference.
    Gravity Forms - T-Shirt with Options

    Each "Choice" requires a separate hidden field.  

    Option: Small

    The field label:  Reference the Field ID of the item as shown in the item's blue label area.
    Gravity Forms- T-Shirt Small

    & the SKU value as set in the Advanced tab.  SKU = abc-small

    Gravity Forms- T-Shirt- Small- Advanced

    Option: Medium
    Gravity Forms - T-Shirt Medium option

    & the SKU value as set in the Advanced tab.  SKU = abc-Medium
    Gravity Forms - T-Shirt option Medium


    Option: Large
    Gravity Forms - T-Shirt Large

    & the SKU value as set in the Advanced tab.  SKU = abc-Large
    Gravity Forms - T-Shirt - Large option advanced

    Custom Questions:

    The following fields are posted as custom questions:
    • Single Line Text
    • Drop Down
    • Number
    • Radio Buttons
    • Paragraph Text
    • Multi Select
    • Checkboxes
    • Hidden
    Gravity Form Custom Questions

    The fields may be placed on the page and configured without any special considerations.  The application will consider all the listed fields as custom questions by default.


    Request.Operation :: Version2.3

    $
    0
    0

    Path: CnPAPI.Engine.Request.Operation

    Elements

    • OperationType
    • IPAddress
    • DeclineFraud
    • EnableRestriction
    • UrlReference

     Operation element specifies the type of operation to be performed. Only Transaction type is available in Release 1.0. Additional operations will be added in the future releases.

    Schema

     <xsd:element name="Operation">
      <xsd:complexType>
       <xsd:sequence>
           <xsd:element ref="OperationType"/>
           <xsd:element ref="IPAddress" minOccurs="0"/>
           <xsd:element ref="DeclineFraud" minOccurs="0"/>
           <xsd:element ref="EnableRestriction" minOccurs="0"/>
           <xsd:element ref="UrlReferrer" minOccurs="0"/>
          </xsd:sequence>
      </xsd:complexType>
     </xsd:element>

    Example

     <Operation>
       <OperationType>Transaction</OperationType>
       <IPAddress>192.168.0.11</IPAddress>
       <DeclineFraud>false</DeclineFraud>
       <EnableRestriction>true</EnableRestriction>
       <UrlReferrer>https://secure.someDomain.com/donate.html</UrlReferrer>
     </Operation>

    OperationType

    Name  

    OperationType  

    Path  

    CnPAPI.Engine.Request. Operation.OperationType  

    Description  

    Define the type of operation to be performed.  

    Data Type  

    String  

    Range  

    Transaction  

    Default  


    Operation  

    All operations  

    Input/output  

    Input  

    Version/Release  

    1.2  

    Required  

    Yes  

    Example  

    <OperationType>Transaction</OperationType>

    Schema

     <xsd:element name= "OperationType" >
      <xsd:simpleType  >
       <xsd:annotation  >
           <xsd:documentation>  Define the type of operation to be performed</xsd:documentation >
       </xsd:annotation  >
       <xsd:restriction base=  "xsd:normalizedString" >
        <xsd:enumeration value=  "Transaction" />

         </xsd:restriction  >
      </xsd:simpleType  >
     </xsd:element>

    IPAddress

    IP address of the computer used for making the transaction. The IP is saved for security and tracking purposes.

    Name  

    IPAddress  

    Path  

    CnPAPI.Engine.Request. Operation.IPAddress  

    Description  

    Card holder’s IP address (xxx.xxx.xxx.xxx)  

    Data Type  

    String  

    Range  

    Maximum 15 characters  

    Default  


    Operation  

    All operation  

    Input/output  

    Input  

    Version/Release  

    1.2  

    Required  

    Yes  

    Example  

    <IPAddress>123.123.123.123</IPAddress>
    You may pass: 0.0.0.0 if client IP cannot be determined, e.g. in Flash / Silverlight.  

     Schema

     <xsd:element name= "IPAddress" >
      <xsd:simpleType  >  
       <xsd:annotation  >  
        <xsd:documentation>  Card holder’s IP address (xxx.xxx.xxx.xxx)</xsd:documentation >  
       </xsd:annotation  >  
       <xsd:restriction base=  "xsd:normalizedString" >  
        <xsd:maxLength value=  "15" />  
       </xsd:restriction  >  
      </xsd:simpleType  >  
     </xsd:element>

    DeclineFraud

    Once enabled, the system will check against a number of services and internal algorithm to detect probability of fraud.  Unless specified the FRAUD system is set to False and no protection will be offered.  It is highly recommended that this node be set to True.  Click & Pledge will not be responsible for any fraudulent transactions in case of fraud being disabled.

    Name  

    DeclineFraud  

    Path  

    CnPAPI.Engine.Request. Operation. DeclineFraud  

    Description  

    Decline a card based on the fraud probability as set by MaxMind & other algorithms.  

    Data Type  

    Boolean  

    Range  

    true / false  

    Default  

    false  

    Operation  

    All operation  

    Input/output  

    Input  

    Version/Release  

    2.9.2  

    Required  

    No  

    Example  

    <DeclineFraud>false</DeclineFraud>  

     Schema

     <xsd:element name= "DeclineFraud" >
      <xsd:simpleType  >  
       <xsd:annotation  >  
           <xsd:documentation  />  
       </xsd:annotation  >  
       <xsd:restriction base=  "xsd:boolean" />  
      </xsd:simpleType  >  
     </xsd:element>

    EnableRestriction

    Country and state restrictions may be enabled in the administrative system and applied to the API transactions. Once enabled, payments originating from the restricted states & countries will decline. The IP address needs to be passed correctly since country will be based on the IP address.

    Name  

    EnableRestriction  

    Path  

    CnPAPI.Engine.Request. Operation.EnableRestriction  

    Description  

    Decline cards from states & countries that are restricted in the administrative system.  

    Data Type  

    Boolean  

    Range  

    true / false  

    Default  

    false  

    Operation  

    All operation  

    Input/output  

    Input  

    Version/Release  

    2.9.2  

    Required  

    No  

    Example  

    <EnableRestriction>false</EnableRestriction>  

     Schema

     <xsd:element name= "EnableRestriction" >
      <xsd:simpleType  >  
       <xsd:annotation  >  
        <xsd:documentation  />  
       </xsd:annotation  >  
       <xsd:restriction base=  "xsd:boolean" />  
      </xsd:simpleType  >  
     </xsd:element  >  

    UrlReferrer

    The URL address of the donation page to be saved in the report.

    Name  

    UrlReferrer  

    Path  

    CnPAPI.Engine.Request. Operation.UrlReferrer  

    Description  

    The web site address of the page  

    Data Type  

    String  

    Range  

    0-300  

    Default  


    Operation  

    All operation  

    Input/output  

    Input  

    Version/Release  

    2.19  

    Required  

    No  

    Example  

    <UrlReferrer>http://tracker1.com</UrlReferrer>  

     Schema

     <xsd:element name= "UrlReferrer" >  
      <xsd:simpleType  >  
       <xsd:annotation  >  
        <xsd:documentation><![CDATA[UrlReferrer.]]></xsd:documentation  >  
       </xsd:annotation  >  
       <xsd:restriction base=  "xsd:normalizedString" >  
        <xsd:maxLength value=  "300" />  
          </xsd:restriction  >  
      </xsd:simpleType  >  
     </xsd:element>


    Salesforce-PaaS-Class-Library :: Version1.4

    $
    0
    0
    The PaaS Class Library provides an easy to use tool for working with the Click & Pledge’s payment API.  Through the Class developers may easily create payment forms and applications for processing credit cards, eChecks, invoices, purchase orders, and any custom defined payment methods, e.g. Pledge, etc.

    Installation

    The library may be installed directly from appExchange:

    Examples

    The examples are offered as an un-managed application as offered through the forum:

    PaidMembershipsPro :: Version1.5

    $
    0
    0
    References:  
    Support:  3rd Party Integrations are supported through the forum only.  Please post all your questions to: http://forums.clickandpledge.com/forumdisplay.php?f=79

    Requirements: Paid Memberships Pro requires a minimum of WordPress version 3.0+
    1. Install & enable the Paid Memberships Pro plugin - http://downloads.wordpress.org/plugin/paid-memberships-pro.zip
    2. Copy all downloaded files to the WordPress project plugins:  <your host root>\wp-content\plugins\ 
    Integration of Click & Pledge:

    It is recommended that all replaced files are backed up for reference.
    1. Download the Click & Pledge plugin from:  https://github.com/ClickandPledge/WordPress-PaidMembershipsPro
    2. Copy all files downloaded from GitHub to the following locations - make sure to follow the file structure hierarchy as provided in the downloaded folder.
      • Copy file ‘paymentsettings.php’ to <your host root>\wp-content\plugins\paid-memberships-pro\adminpages\  [replaces the paymentsettings.php]
      • Copy file‘class.pmprogateway_cnp.php’ to <your host root>\wp-content\plugins\paid-memberships-pro\classes\gateways\
      • Create a folder called:  CnP in <your host root>\wp-content\plugins\paid-memberships-pro\classes\gateways\ paid-memberships-pro\includes\lib
      • Copy files ‘Countries.xml’, ‘US_States.xml’ to <your host root>\wp-content\plugins\paid-memberships-pro\includes\lib\CnP\
    Set Up:
    • Login to WordPress:  http://<your_wordpress_home>/wp-login.php
    • Click on ‘plugins->Installed Plugins’ & enable the ‘Paid Memberships Pro’ 

      Paid Memberships Pro Enable
    • Setup your settings by clicking on  ‘Memberships’ 
    • Click on ‘Memberships->Payment Settings’ to setup payment gateway
    • Select ‘Click & Pledge’ from above screen in ‘Payment Gateway´option, then enter ‘Account ID’ and ‘API Account GUID’

      Click & Pledge API Information

    Tax Settings:

    To add Tax for US & Non-US countries & states the Click & Pledge tax settings plugin is required:
    • Copy ‘pmp-tax’ folder from downloaded files to <your host root>\wp-content\plugins\
    • Click to  ‘plugins->Installed Plugins’ and enable the ‘PMPro Customizations’ plugin

      Paid Memberships Pro Customization
    • Memberships -> Payment Settings -> Payment Gateway: Select ‘Click & Pledge’ from dropdown list provided at ‘Payment Gateway’

      Paid Memberships Pro Gateway
     
    Enter the state and tax values. Enter values as ""CountryCode-StateCode-TaxRate" Separated with comma.  The above example will charge 10% tax for all payments originating in the US and the state of Pennsylvania.  Additional states need to be added as: US-PA-10, US-VA-5,US-CA-6


    Payment-as-a-Service :: Version3.2

    $
    0
    0

    Join the User Forum:  Payment-as-a-Service User Group

    About:

    Click & Pledge’s Payment Application Interface (PAI) provides a comprehensive API for the Trio payment and administrative engine. Through the PAI, programmers may interact with the Trio system within their respective applications.

    By default all accounts are set up with the API credentials. To access the API information follow the steps listed below:

    Make sure to check the sample code section as well as the Sandbox for testing the XML’s generated by your code. [Check the table of content for links].

    Questions?  Post your questions to the forum at:

    Web Service

    Please use the following link for connecting with the service:

    • https://paas.cloud.clickandpledge.com/PaymentService.svc?wsdl
    • Available methods:
      • Operation
      • OperationBase64Encode
      • Echo

    The service will ONLY respond to secure sites.  To use the API the site hosting the form has to be hosted on a secure site (https).

    Manual, Schema & XML Sample

    The following are various documents describing the PAI and its parameters.

    Click & Pledge Secured

    Click & Pledge is a certified PCI-Level 1 application service provider.  Our API has undergone testing and security audit by Control Case and therefore is fully compliant with PCI standards.  You may add Click & Pledge secured button to forms.  The button will change color according to the page’s security setting.

    Download:  ClickandPledge_Secured.zip

    Support

    Due to the nature of the PAI and the many environments that programmers may use, support is only provided through the user forums at: 

    Please join the forum and post your questions to the appropriate list.

    Swiper1 :: Version2.5

    $
    0
    0
    Swiper1 Mobile Payment

    Swiper1 Logo
    Swipe credit cards on your mobile smart phone. Events, gatherings, and more. Anywhere you want to accept credit cards in person.

    The Swiper1 plugs directly into an Android or iPhone mobile phone through the audio-jack and processes credit cards securely in a few simple steps. The optional Salesforce integration provides identification of contact information by looking up the name listed on the credit card. All transactions are recorded and may be downloaded through the Click & Pledge portal as well as Salesforce.

    Features:
    • Accept payments anywhere using your Android or iPhone mobile phone.  For a list of tested devices please see:  http://forums.clickandpledge.com/showthread.php?t=1395
    • Encrypted transactions, ensuring highest level of security and PCI compliance
    • Accept all major credit /debit cards [Visa, MasterCard, Discover, and American Express]
    • Fully integrated with Salesforce CRM + Salesforce Events attendee Check-in / Check-out.
    • QR-Scan Pay offering processing based on a previously processed transaction.
    • Recurring payments with customizable periods for both Installment & Subscription plans.
    • Free mobile virtual terminal.
    • Product catalogs and listings.
    • Allows for additional payments.
    • Real-time receipts – email, SMS (txt message) or print, compatible with portable Bluetooth printer.
    • Tax and tax deductible settings.
    • Custom questions compliant with FEC requirements.
    • Acceptance of Terms & Conditions with option to be included in the printed receipt.
    • Simple pricing model – no additional cost per transaction.
    • All standard Click & Pledge merchant account pricing applies.

    Get Started :: Version1.6

    $
    0
    0
    The integration between Click & Pledge's Payment System and Salesforce allows you to have a World Class CRM with Click & Pledge's feature-rich applications to assist you with your data management and fundraising needs. TO easily get started using Click & Pledge's  Payment as a Service App on the Salesforce platform, follow these easy steps:

    Step 1: Apply for a Click & Pledge account

    If you already have an account, skip this step. If you do not already have a Click & Pledge account, apply for one here:
    https://www.clickandpledge.com/Apply/

    Step 2: Apply for a Salesforce account

    If you already have a Salesforce account skip this step. For Nonprofit Organizations, you may apply for an account through the Salesforce Foundation. Through the Salesforce Foundation you may receive 10 FREE user licenses for Salesforce CRM. Find out more by going here:
    http://www.salesforcefoundation.org/product
    Nonprofits must first sign up for a trial version, you choose either the account enabled with the NonProfit Starter Pack or the Enterprise edition.

    Then, once you have set up your trial account, you will need to apply for a permanent license from Salesforce: https://www.clickandpledge.com/Platforms/Salesforce/Get_Salesforce.asp#PermanentLicense

    Step 3: Install the Click & Pledge Payment Class Library app

    This app is available on the Salesforce App Exchange here:
    http://appexchange.salesforce.com/listingDetail?listingId=a0N30000009vEKZEA2

    Step 4: Install the Click & Pledge Free Payment Processing System or Payment as a Service (PaaS)

    To locate the App, use this link:
    https://sites.secure.force.com/appexchange/results?type=Apps&keywords=click and pledge

    Step 5: Follow the PaaS Post Installation Instructions

    http://manual.clickandpledge.com/Salesforce-PaaS-Post-Installation.html

    Step 6: Integrate Click & Pledge and Salesforce.

    http://manual.clickandpledge.com/Salesforce-PaaS-Activation.html

    Step 7: Run a test transaction

    By running a test transaction you will see your contact and transaction data automatically post into your Salesforce account. Here are instructions to run a test transaction:
    http://forums.clickandpledge.com/content.php?r=248-Run-a-Test-Transaction

    WordPress :: Version1.3

    $
    0
    0
    Click & Pledge's integrations with WordPress are offered for free to all clients.  The following 3rd party applications are currently available:
    • Shopp Plugin
    • WooCommerce
    • GravityFroms
    • PaidMembershipsPro
    • WPJobBoard
    Support for all third party integrations are offered through the forum at:  http://forums.clickandpledge.com/forumdisplay.php?f=66

    WPJobBoard :: Version1.6

    $
    0
    0

    Prerequisites

    • WordPress 3.3 (it will work with WordPress 3.0 but 3.3 version is recommended)PHP 5.2.4 or greater
    • PHP 5.2.0
    • MySQL 5.0+

    How to install WPJobBoard:

    How to install Click & Pledge Gateway:

    1. Download the plugin from: https://github.com/ClickandPledge/WordPress-WPJobBoard.
    2. Extract the plugin
    3. Upload the Plugin folder to the wp-content/plugins folder in the WordPress directory online, using an FTP program.
    4. Go to the Plugins screen in the admin area and find the newly uploaded Plugin in the list.

      Activate Plugin
    5. Click on the Activate link to activate the plugin.
    6. Once activated, the plugin may be reviewed at:  Settings(WPJB)->Configuration (Payment Methods Section)
    7. Click on ‘Edit’ and enter the Click & Pledge Account Information
    Admin login:

    http://<your_wordpress_home>/wp-admin.php
    to log into WordPress admin area. 

    WordPress Login
     
    After login into the admin area select Settings (WPJB)->Configuration to launch WPJobBoard  Configuration Page

    WPJobBoard- Plugins
     
    How to add Payment Processor?

    Go to Settings(WPJB)-> Configuration (Payment Methods)

    WPJobBoard- Payment Methods


    Click on Edit & review the following screen:

    WPJobBoard Click & Pledge Configuration

    Add the ‘C&P Account ID’ and ‘C&P API Account GUID’ in the corresponding fields.  The Account ID & GUID may be obtained from https://Portal.ClickandPledge.com > Account Info > Profile > API Information.

    The following fields may be customized:
    • Payment Methods:  Select which credit cards & payment methods to be used in the form.
    • Receipt Header: The email receipt header, e.g.  Company name, address, contact information, etc.
    • Terms & Conditions:  The terms & conditions to be shown on the form as well as the receipt.
    The recurring payment option may be enabled through the options shown below:

    WPJobBoard Recurring Payment

    Special Considerations:
    • WPJobBoard does not post transactions with $0 to the gateway and as such those transactions are not processed by Click & Pledge.  Transactions that are not posted to Click & Pledge will not post to Salesforce.
    Note: For other information about WPJobBoard Plugin follow the URL below

    Form-Field-Names :: Version9.8

    $
    0
    0

    For a form to post to the FaaS service it has to have fields that match the field names as specified in the API.

    Minimum fields required for credit card authorization are as follows:
    • First Name
    • Last Name
    • Credit card number
    • CV2
    • Expiration date (month & year)  

    The following provides a detailed list of field names in the FaaS platform.

    Card Holder Information

    Common name    

    FaaS Field name    

    Example    

    Maximum Length    

    First Name    

    BillingFirstName    

    John    

    50    

    Middle Initial    

    BillingMI    

    G    

    1    

    Last name    

    BillingLastName    

    Doe    

    50    

    Email    

    BillingEmail    

    John.Doe@Test.com    

    50    

    BillingPhone    

    BillingPhone    

    555.111.2222    

    50  

    Billing Address

    Common name    

    FaaS Field name    

    Example    

    Maximum Length    

    Address1    

    BillingAddress1    

    2200 Kraft Drive    

    100    

    Address2    

    BillingAddress2    

    Suite 1175    

    100    

    Address3    

    BillingAddress3    


    100    

    City    

    BillingCity    

    Blacksburg    

    50    

    State or Province

    BillingStateProvince

    VA    

    50    

    Postal Code    

    BillingPostalCode    

    24060    

    20    

    Country Code    

    BillingCountryCode    

    840    

    3    

    Shipping Address

    Common name    

    FaaS Field name    

    Example    

    Maximum Length    

    First Name    

    ShippingFirstName    

    John    

    50    

    Middle Initial    

    ShippingMI    

    C    

    1    

    Last Name    

    ShippingLastName    

    Smith    

    50    

    Email    

    ShippingEmail    

    John.Smith@domain.com    

    50    

    Phone    

    ShippingPhone    

    123 456 7890    

    50    

    Address1    

    ShippingAddress1    

    2200 Kraft Drive    

    100    

    Address2    

    ShippingAddress2    

    Suite 1175    

    100    

    Address3    

    ShippingAddress3    


    100    

    City    

    ShippingCity    

    Blacksburg    

    50    

    State or Province    

    ShippingStateProvince

    Virginia    

    50    

    Postal Code    

    ShippingPostalCode    

    24060    

    20    

    Country Code 

    ShippingCountryCode

    840

    3

    Custom Question

    Common name    

    FaaS Field name    

    Example    

    Maximum Length    

    Question    

    FieldName    

    Employer    

    200    

    Answer    

    FieldValue    

    Click & Pledge    

    500    

    Example:    

    <input name="FieldName" type="hidden" value="Employer"/>
    <input name="FieldValue" type="text" maxlength="500" size="50 />  

    In case of multiple custom questions use a numerical suffix as shown below:  

    <input name="FieldName1" type="hidden" value="Employer"/>
    <input name="FieldValue1" type="text" maxlength="500" size="50 />  

    <input name="FieldName2" type="hidden" value="Occupation"/>
    <input name="FieldValue2" type="text" maxlength="500" size="50 />  

    <input name="FieldName3" type="hidden" value="Place of Employment"/>
    <input name="FieldValue3" type="text" maxlength="500" size="50 />  

    eNewsletter Subscription

    Custom question is an optional field  

    Common name  

    FaaS Field name  

    Example  

    Maximum Length  

    Provider  

    eNewsletterName1 /2/ 3

    ConstantContact, MailChimp, iContact, PredictiveResponse

    n/a  

    List name  

    SubscribeList1 /2/ 3/

    Membership  

    50    


    Notes:
    The integrated newsletter providers are numbered according to the following list.  The name & the respective list should be numbered accordingly.  

    • eNewsletterName1 = ConstantContact  
    • eNewsletterName2 = MailChimp
    • eNewsletterName3 = iContact
    • eNewsletterName4 = PredictiveResponse


    Example:
     

        <input name= "eNewsletterName1" type="hidden" value="ConstantContact" />   

        Membership: <input name="SubscribeList1" type="checkbox" id="SubscribeList1" value="Membership" />
        Weekly Updates:  <input name="SubscribeList1" type="checkbox" id="SubscribeList1" value="Weekly Updates" />
        Alerts: <input name="SubscribeList1" type="checkbox" id="SubscribeList1" value="Alerts" />
        Monthly Updates:  <input name="SubscribeList1" type="checkbox" id="SubscribeList1" value="Monthly Updates" />  

    <input name="eNewsletterName2" type="hidden" maxlength="200" size="40" value="MailChimp "/>  

        Membership: <input name="SubscribeList2" type="checkbox" id="SubscribeList2" value="Membership" />
        Weekly Updates:  <input name="SubscribeList2" type="checkbox" id="SubscribeList2" value="Weekly Updates" />
        Alerts: <input name="SubscribeList2" type="checkbox" id="SubscribeList2" value="Alerts" />
        Monthly Updates:  <input name="SubscribeList2" type="checkbox" id="SubscribeList2" value="Monthly Updates" />
     

    Product Information

    Common name    

    FaaS Field name    

    Example    

    Maximum Length    

    Item ID    

    ItemID1   

    12345    

    20    

    Item Name    

    ItemName1   

    Donation    

    50    

    Quantity    

    Quantity1   

    1    

    10    

    Unit Price    

    UnitPrice1   

    100    

    10    

    Other field [special case]*    

    Other1   

    5.50    

    10    

    Unit Deductible    

    UnitDeductible1   

    100    

    10    

    Unit Deductible %*    

    UnitDeductible1   

    50% [for 50% tax deductible]    

    10    

    Unit Tax    

    UnitTax1   

    0    

    10    

    Unit Discount    

    UnitDiscount1   

    0    

    10    

    SKU  

    SKU1  

    100-ABCD-2011  

    100  

    Campaign

    Campaign1

    Building Fund

    80

    Important Note:    

    UnitDeductible: The portion of the UnitPrice that is tax deductible. The amount will be based on the value passed (10 = $10 and 10%=10%). Total tax deductible portion of the item will be calculated based on multiplying the quantity by the UnitDeductible.  

    Total Tax Deduction = UnitDeductible x Quantity  

    Example:  

    Case 1:  

    ·  Unit Price = $50  

    ·  UnitDeductible = 10  

    o  Total tax deductible = $10  

    Case 2:  

    ·  Unit Price = $50  

    ·  UnitDeductible = 10%  

    o  Total tax deductible = $5  

    OTHER field  

    FaaS service design is based on simplifying processing payments through simple forms without any need for additional programming. Based on this requirement a problem presents itself when donation forms have donation amounts listed as radio buttons with an additional field which is typically labeled as OTHER.  

    To help with the “OTHER” field problem the following provision is now a feature of FaaS:  


    • $10  
    • $20  
    • $50  
    • $100  
    • OTHER  
    • [OTHER field]  

    In the above scenario a radio form field passes UnitPrice as the value of the radio field. If the value which is passed by the UnitPrice is “OTHER” then FaaS looks for the amount which is in a text field labeled “OTHER”.  

    The following is a sample HTML demonstrating the above presentation:  

      <input type="radio" name="UnitPrice1" id="radio" value="10" />$10<br />  

      <input type="radio" name="UnitPrice1" id="radio" value="20" />$20<br />  

      <input type="radio" name="UnitPrice1" id="radio" value="30" />$30<br />  

      <input type="radio" name="UnitPrice1" id="radio" value="40" />$40<br />  

      <input type="radio" name="UnitPrice1" id="radio" value="50" />$50<br />  

      <input type="radio" name="UnitPrice1" id="radio" value="Other" />Other<br />  

      Other <input name="Other1" type="text" id="Other1" size="10" />  

    If the radio button option for Other is selected, the Other field text value will be used by FaaS as the value passed.  

    Multiple products  

    As shown in Example 001 multiple products may be added to any form by simply incrementing the fieldname for each item.   The following provides a quick overview example:  

                <input name="UnitPrice1" type="text" id="UnitPrice1" value="5" size="10" />
                <input name="UnitDeductible1" type="hidden" id="UnitDeductible1" value="100%" /> 
                <input name="ItemID1" type="hidden" id="ItemID1" value="1" />
                <input name="ItemName1" type="hidden" id="ItemName1" value="Cause 1" />
                <input name="Quantity1" type="hidden" id="Quantity1" value="1" />
                <input name="SKU1" type="hidden" id="SKU1" value="ABC-1234" />
                <input name="
    Campaign1" type="hidden" id="Campaign1" value="Building Fund" /> 

                 <input name="UnitPrice2" type="text" id="UnitPrice2" value="10" size="10" />
                <input name="UnitDeductible2" type="hidden" id="UnitDeductible2" value="5" /> 
                <input name="ItemID2" type="hidden" id="ItemID2" value="2" />
                <input name="ItemName2" type="hidden" id="ItemName2" value="Cause 2" />
                <input name="Quantity2" type="hidden" id="Quantity2" value="1" />
                <input name="SKU2" type="hidden" id="SKU2" value="DEF-1234" />
                <input name="
    Campaign2" type="hidden" id="Campaign2" value="Travel Fund" />  

    There is no limit on the number of elements that may be passed.  

    Shipping Information

    Shipping information is an optional field  

    Common name    

    FaaS Field name    

    Example    

    Maximum Length    

    Method    

    ShippingMethod    

    FedEx    

    20    

    Fee    

    ShippingValue    

    30    

    50    

    Tax    

    ShippingTax    

    2    

    50  


    Important Note

    The following are key points in dealing with shipping.
    • For Shipping to be added to the receipt ShippingMethod has to have a value.  If the value is blank no shipping will be posted.
    • In the absence of "Shipping Address" nodes "Billing Address" will be used for "Shipping Address" nodes.

    Receipt Information

    Common name    

    FaaS Field name    

    Example    

    Maximum Length    

    WID [Required] 1    

    WID    

    8354    

    10    

    Send Receipt    

    SendReceipt    

    true    

    10    

    Notification List    

    EmailNotificationList    

    test@test.com    

    45    

    Transaction Type 2    

    TransactionType

    Payment 

    Authorize
    Payment
    PreAuthorization

    Important Note

    1 CheckOutPageID (WID) identifies the checkout page whose information should be used for the receipt information. This is a required field. Other aspects of the checkout page are also carried over to the form. The following are the list of items that are included:  

    • Salesforce integration  
    • ConstantContact settings  
    • MailChimp settings  
    • Address / Organization Info  
    • Terms & Conditions  
    • Notification List  

    TransactionType is only available for Merchant accounts. The setting will be ignored for in-house accounts. The following describes the behavior of each option:  

    • Authorize: The transaction will be authorized but will not settle. Manual settlement with the gateway will be required.  
    • Payment: The transaction will be submitted for settlement upon authorization. No manual intervention will be required.
    • PreAuthorization:  The transaction will be submitted as $0.  PreAuthorization posts back the VaultGUID for the credit card which may be used for future transactions.  Nothing will be processed or charged to the card.

    Recurring Transactions

    Recurring Transaction is an optional field  

    Common name    

    FaaS Field name    

    Example    

    Maximum Length    

    Number of payments*    

    Installment    

    12    

    20    

    Periodicity    

    Periodicity    

    Month    

    Week

    2 Weeks    

    Month    

    2 Months    

    Quarter    

     6 Months    

    Year    

    *The optional “LastPaymentDate” may be used in place of Installments when an end date for a recurring payment is needed. In certain forms a donor may want to choose a recurring option where an end date is selected rather than the number of payments. End date has the following attributes:  

    •   LastPaymentDate: dd/mm/yyyy  

    End date may also be broken down into its elements as follows:  

    • LastPaymentDateYear  (yy)
    • LastPaymentDateMonth  (mm)
    • LastPaymentDateDay (dd)

    Special Condition:
    • Installment = 999:  The special case of 999 translates to indefinite recurring payments.  The receipt message for the recurring payment will NOT display the END DATE and will ask the patron to contact the organization for cancellation.

    Payment Information

    The following payment types are supported:

    • CreditCard
    • Check
    • Invoice
    • Purchase Order

    Credit Card

    Common name    

    FaaS Field name    

    Example    

    Maximum Length    

    Payment Type    

    PaymentType    

    CreditCard 


    Name On Card    

    NameOnCard    

    John Smith    

    50    

    Card Number    

    CardNumber    

    4111111111111111    

    17    

    Cvv2    

    Cvv2    

    123    

    4    

    Expiration Date*    

    ExpirationDate    

    04/15    

    5    

    Expiration Month    

    ExpirationMonth    

    04    

    2    

    Expiration Year    

    ExpirationYear    

    15    

    2    

    Expiration Date may be passed on as a single value as 04/15 or it may be passed individually as month and year. This provision is designed to help with a simple form where month and year are pull-down menus and are posted individually.  

    Check

    Gateways: Transfirst

    Common name    

    FaaS Field name    

    Example    

    Maximum Length    

    Payment Type    

    PaymentType    

    Check


    Routing Number  

    RoutingNumber   

    123456   

    9    

    Account Number   

    AccountNumber 

    123456

    17    

    Account Type

    AccountType    

    CheckingAccount, SavingsAccount   


    Check Type  

    CheckType   

    Company, Personal


    Check Number 

    CheckNumber

    12345  

    10    

    The following additional fields required for Global Payments gateway.  

    Common name    

    FaaS Field name    

    Example    

    Maximum Length    

    ID Type    

    IdType    

    Driver or Military or State    


    ID Number    

    IdNumber    

    12345678910    

    30    

    ID State Code    

    IdStateCode    

    VA [state abbreviation code]    


    Invoice

    Common name    

    FaaS Field name    

    Example    

    Maximum Length    

    Payment Type  

    PaymentType

    Invoice   


    Invoice Number

    InvoiceNumber

    12345

    50

    Purchase Order

    Common name    

    FaaS Field name    

    Example    

    Maximum Length    

    Payment Type    

    PaymentType

    PurchaseOrder   


    Purchase Order Number 

    PurchaseOrderNumber    

    123456789

    50

    Service Response

    Common name    

    FaaS Field name    

    Minimum Length    

    Maximum Length    

    Authorization URL    

    OnSuccessUrl    

    https://mydomain.com/authorize.html    

    100    

    Decline URL    

    OnDeclineUrl    

    https://mydomain.com/decline.html    

    100    

    Error URL    

    OnErrorUrl    

    https://mydomain.com/error.html    

    100  

    The following responses are sent back as part of the URL upon Authorization:  

    • on = Order number  
    • vg = Vault GUID  
    • au = Authorization code  
    • gn = Gateway transaction number  
    • RefID = Reference ID (post back of RefID as shown below).
    • HashResponse = The hash code response based on the security code.  Format:  [SecurityCode][Order Number][Amount]
      • Login to the administrative portal
      • Click on Account Info > Profile > API Information
      • In the FaaS Security Service:
        • Secret Key:  Enter a maximum of 50 characters as a secret key.  The secret key will be included in the hashcode
        • Hash Algorithm:  MD5, SHA-1, SHA-256, SHA-348, SHA-512
      • [Amount] needs to be the full amount with decimal included, for example:  25.00

    example:  https://www.clickandpledge.com/developers/faas/example/response/authorize.asp?on=1182513157454111&vg=5f86601d-0ae0-4c0f-9d74-dba9a70fa349&au=220632&gn=4e552ade-9e98-3000-0034-0003ba9896f7&RefID=Example-000

    The following forum posts may also be of help:


    Reference ID

    Common name    

    FaaS Field name    

    Minimum Length    

    Maximum Length    

    Reference ID    

    RefID    

    0    

    No Limit    

    Reference ID (RefID) may be passed as a hidden variable. The value of RefID will be posted back to the service response URL upon authorization, decline, or error.  

    Account Information

    Account Information may be obtained by logging into the administrative portal at https://Portal.ClickandPledge.com > Account Information > Profile > API Information

    Common name    

    FaaS Field name    

    Example    

    Maximum Length    

    Guid*    

    AccountGuid    

    ddd31189-9a80-41d9-99e7-fdbb4350893c   

    36    

    Account ID*    

    AccountID    

    14521    

    10    

    * Account information may be combined through AccountToken. AccountToken format is as follows:  

    • AccountToken: AccountGuid/AccountID/CheckoutPageID/Tracker  

    If CheckOutPageID is not needed use -1 as the value  

    • AccountToken: AccountGuid/AccountID/-1/Tracker  

    AccountToken is useful when a form needs to post all account information fields as an option. For example an organization may have three accounts and wants to use one donation form to accept donations for all three accounts giving the donor the option for donating to a specific account, e.g. Foundation, PAC, and Building Fund. In this case a radio button may be used and AccountToken will be used to pass the account information with each radio button.  

    Order Mode

    Common name  

    FaaS Field name  

    Example

    Maximum Length  

    Order Mode  

    OrderMode  

    Production

    Production / Test  

    Tracker  

    Tracker  

    Campaign123  

    50

    Campaign

    Campaign

    Spring 2011

    80

    DecimalMark

    Amounts may be entered by the end user using comma as a thousand separator or period as thousand separator.  This problem does not have an easy solution from a usability perspective.  The programmer needs to either write a JavaScript to unify the number format or show an error / warning message asking the end user not to use a thousand separator.  To help those programmers that do not know JavaScript the following option offers a regional setting that forces the FaaS system to respond according to a set standard.  See examples for details.

    Common name    

    FaaS Field name    

    Values    

    Maximum Length    

    DecimalMark  

    DecimalMark  

    US, ISO  (Default = US)  

    3


    Example:
    The end user enters $1234.56 (One thousand two hundred thirty four Dollars and 56 Cents using a thousand separator as:  $1,234.56

    The FaaS service will interpret the value differently based on the following settings:
    • US:   $1,234.56
    • ISO:  $1.23

    While there is no easy solution for this problem, the suggested solution offers the most freedom for developers to set the standard based on their regional or standard preference.

    Convenience Fee

    Convenience fee may be added to approved transaction types.

    Common name

    FaaS Field name

    Example

    Maximum Length

    Convenience Fee Rate 

    ConvenienceFeeRate

    3 (for 3%)


    Convenience Fee Fixed 

    ConvenienceFeeFixed

    1.50 (for $1.50)


    Postback

    Postback method may be set to Post or Get for the authorization response.

    Common name

    FaaS Field name

    Example

    Maximum Length

    Postback 

    Postback

    Post or Get


    Response description:

    • Get (default):  Authorization code will post back to the Authorize URL.
    • Post:  All posted form values will be posted back in addition to the authorization, decline, and error messages.

    ChargeDate [Not supported for ACH]

    Common name    

    FaaS Field name    

    Example   

    Maximum Length    

    Charge date YEAR   

    ChargeDateYear   

    2013

    4

    Charge date MONTH

    ChargeDateMonth   

    10

    2

    Charge date DAY   

    ChargeDateDay   

    25

    2

    Future date transactions are NOT supported for ACH/eCheck processing.  The option is available only for credit card transactions.

    The following special treatment is provided for convenience:

    • Charge date Year: If YEAR is NOT passed the current YEAR will be assumed by default
    •  Charge date Month: If MONTH Is NOT passed the current MONTH will be assumed by default

     A payment form may ask the patron to start her payment on a specific date, e.g. beginning of the month. In this case regardless of the day of the month that the payment is being initiated the payment will be charged on the first of the month. If the requested day is invalid (February 31) an error will be returned as invalid date so it is important that the form does not allow for invalid dates to be set for processing.

    Please note:

    Initiating a payment on the 31st of the month will set the payment to be processed on the first month that has 31 days.

    Here are a few examples:

    Example 1:

    • Transaction date: January 2, 2013
    • Request processing date: 1st of the month
    • Transaction will process on February 1, 2013

    Example 2:

    • Transaction date: January 2, 2013
    • Request processing date: 31st of the month
    • Transaction will process on March 31, 2013

    Example 3:

    • Transaction date: January 2, 2013
    • Request processing date: January 1
    • Transaction will process on January 1, 2014

    Example 4:

    • Transaction date: January 2, 2013
    • Request processing date: 3rd day of the month
    • Transaction will process on January 3, 2013

    Recommendation:

    A typical scenario is when a donor wishes to start a recurring payment but wants the payment to be processed on the first of each month and continue every month, e.g. January 1, February 1, March 1, etc.

    In such a case it is recommended that the only value that is passed be the ChargeDateDay and the rest not be posted. The following node needs to be added:

    • <input name="ChargeDateDay" type="hidden" id="ChargeDateDay" value="1" />

    If a pull down menu is to be provided for selecting the date it is strongly recommended that the pull down menu does not offer 29, 30, 31 as available days to avoid problems with such months as February, April, etc.

    Gravity-Forms :: Version3.1

    $
    0
    0
    References:
    Support:  3rd Party Integrations are supported through the forum only.  Please post all your questions to: http://forums.clickandpledge.com/forumdisplay.php?f=78

    Requirements: 
    • Gravity Forms requires a minimum of WordPress version 3.7+
    • MySQL 5
    • PHP 5
    Setup:       

    • Go to ‘plugins->Installed Plugins’ enable the ‘Gravity Forms Click & Pledge’
     Enable Gravity Form / Click & Pledge 
    • Click on ‘Forms->Settings->C&P Payments’ to enter Click & Pledge Credentials like ‘Account ID’, ‘API Account GUID’ and to setup other settings
    • Account ID, API GUID are located at the Click & Pledge administrative portal > Account Info > Profile > API

      Click & Pledge API Information

    • Please follow the documentation here to create a form http://www.gravityhelp.com/documentation/page/New_Form
    Assigning From to process through Click & Pledge:
    • Click on ‘Forms->Click & Pledge’ to display all available forms
    • Select the ‘Gravity Form’ to process then click on ‘Save’ button

    Setting SKU for a Product:

    SKU's are added for each item and option as a hidden field.  The following example shows how to add SKU to a single item as well as one with options.

    Example 1:  T-Shirt with SKU=abc-123

    Item definition:

    Gravity Forms - T-Shirt

    Note:  In the above example the Field id for the item is shown as:  Field ID 2.

    Add a hidden field:

    GravityForms Hidden Fields

    Set up the hidden field referencing the Field ID as in the Product setting:

    Properties field label:  {SKU}{FIELDID=2} - Please note that all fields are case sensitive - SKU & FIELDID should be in all caps.

    Gravity Forms- T-Shirt- Properties

    The Advanced tab is the value of the SKU.
    Gravity Forms- T-Shirt- Advanced

    Example 2:

    For products with options such as those listed in a pull down menu or a radio button, each option needs to be set up with an SKU.  SKU's may be the same or different.

    Hidden field format:  {SKU}{FIELDID=fid}{OPTION=value}
    • fid = Field ID of the product as listed in the Product listing
    • value = Option's label - each option of a product has to be set up with a unique label and that label needs to be listed to identify the SKU's reference.
    Gravity Forms - T-Shirt with Options

    Each "Choice" requires a separate hidden field.  

    Option: Small

    The field label:  Reference the Field ID of the item as shown in the item's blue label area.
    Gravity Forms- T-Shirt Small

    & the SKU value as set in the Advanced tab.  SKU = abc-small

    Gravity Forms- T-Shirt- Small- Advanced

    Option: Medium
    Gravity Forms - T-Shirt Medium option

    & the SKU value as set in the Advanced tab.  SKU = abc-Medium
    Gravity Forms - T-Shirt option Medium


    Option: Large
    Gravity Forms - T-Shirt Large

    & the SKU value as set in the Advanced tab.  SKU = abc-Large
    Gravity Forms - T-Shirt - Large option advanced

    Custom Questions:

    The following fields are posted as custom questions:
    • Single Line Text
    • Drop Down
    • Number
    • Radio Buttons
    • Paragraph Text
    • Multi Select
    • Checkboxes
    • Hidden
    Gravity Form Custom Questions

    The fields may be placed on the page and configured without any special considerations.  The application will consider all the listed fields as custom questions by default.


    Post-Installation :: Version5.8

    $
    0
    0

    Need Assistance with Post Installation?

    You can join our forum and get the help you need. Please post to the forum that you need upgrade assistance here:

    http://forums.clickandpledge.com/forum/platform-product-forums/salesforce-upgrade-assistance

    Step 1: Add C&P Account Info to C&P Settings

    Go to C&P Settings > C&P Account to add your Click & Pledge accounts. There is no limit on the number of Click & Pledge accounts that may be added in a single Salesforce.com instance.
    • C&P Account Name - Enter one name to C&P Account. This is used for the internal reference.
    • C&P Account Number - Enter the Click & Pledge Account Number. See below for instructions to know how to find the C&P Account Number.
    • C&P Account GUID - This number is located in your Click & Pledge Account. See below for instructions to know how to find the C&P Account GUID.
    • C&P Account Status - Select the status (Active / Inactive) from the drop down menu.  
    • C&P Account Currency Code - Select the currency code from the drop down menu. 
    Step 1 C and P Settings
    After entering the above information, click  on 'Add/Update’. Once the Account is created, it can be modified by clicking 'Edit'. Or deleted by clicking 'Del' button.

    Hint: If you do not see the C&P Settings tab you can access it by clicking on the + sign on the very right end of your tab area. This will bring up all your tabs.
    Access Tabs

    To find your Click & Pledge Account information you need to:

    1. Login to your Click & Pledge Account at  https://portal.clickandpledge.com and click on the ‘Account Info’ which is at the upper right corner.
    2. Under the 'Your Profile' tab, click 'API Information'.
    3. Find Account ID (C&P Account Number) and API (PaaS/FaaS) Account GUID (C&P Account GUID).
    Step 1 C and P Portal

    Step 2: Set up Contact matching Preferences

    Within C&P Settings, go to Contact & Account tab to set up preferences
     
    With Contact Matching you can customize when your Contacts are to be created by choosing a Match Mode and selecting which field(s) you wish to include. This allows an organization complete control of Contact Creation which will eliminates duplicate Contacts.

    Note: Most organization should find that the Semi Automatic mode will work best to reduce duplicates. Transactions will be added to a Contact when fields match and then organization will use C&P Temporary Contact tab to determine how to handle all Contacts who do not match.

    Match Mode - Choose a mode. With Contact Settings there are 3 modes to choose from:
    • Fully Automatic Contact Creation - A transaction will be placed under an existing Contact when one of the selected fields within each of your chosen columns is matched. If a transaction does not meet the selected criteria then a new Contact is created.
    • Semi Automatic Contact Create - A transaction will be placed under an existing Contact when one of the selected fields within each of your chosen columns is matched. If a transaction does not meet the selected criteria then it will be created in C&P Temporary Contact.
    • Manual Contact Creation - Every transaction will create a contact within C&P Temporary Contact.
    C&P Temporary Contact tab will allow you to choose to create a new contact or merge with an existing contact.

    Match Fields: Select field(s) you wish to have the Contact search select from. For columns, you can choose one or more fields. To select more than one field in a column, select <CTRL> key then select fields. A Contact will need to match one field within each column. Only choose fields within the columns you wish to have included in the search. See example below:

    Match Fields

    Step 3: Set up ‘Contact & Account’ Mapping Preferences

    After selecting your preferences, don’t forget to save the changes by clicking on ‘Update Map Fields’.
    Step 3 Update Map Fields

    Step 4: Update Setting on Contact Layout Pages

    To setup all settings, go to 'Contact Page Layout' page first. The path is shown below:
    Click 'Setup' > App Setup > Customize > Contacts > Page Layouts > Click on Edit.
    Step 4 Setup

    Step 4 Contact Page Layout

    Step 4a: Add 'C&P Miscellaneous Information' Visualforce Page to Contact View page

    Completing Step 4a will allow you to view Credit Card, eCheck payments, Manual Opportunity Settlement and Soft Credits on your Contact's page.

    In 'Contact Layout' select 'Visualforce pages' section.  Drag the 'section' icon to create a new section. Name the section 'C&P Info' then drag 'C&P Miscellaneous' to that section. Save the settings.

    After adding this page, you will be able to see payment details in the Contact Detail page.
    Step 4 C and P Info

    Step 4b: Place 'Virtual Terminal' button & 'Invoice Virtual Terminal' button in Patron/Contact Detail page


    In 'Contact layout', select 'Buttons' section. Drag 'Virtual Terminal' button and 'Invoice Virtual Terminal' button into 'Custom Buttons' area under 'Contact Detail' section. Then click on Save.

    Step 4b Buttons

    Step 4c: Place 'Related Lists' on Patron/Contact Detail Page

    At 'Contact Layout' select 'Related Lists' section. Add:
    • C&P Autoresponder Queue
    • C&P Autoresponder Sent Email Log
    • C&P Contact Alias
    • C&P Custom Questions
    • C&P Data
    • C&P Recurrings
    • C&P Soft Credits Given
    • C&P Soft Credits Received
    • C&P Transactions
    • Opportunities
    • C&P Invoice
    • C&P Pledge
    • C&P Broadcaster Member Activity
    Drag these Related Lists items and place them in an appropriate place (up to User convenience). Then click on Save.
    Step 4c Related Lists

    Step 4d: Place 'Fields' on Patron/Contact Detail Page

    At 'Contact Layout' select 'Fields' section. Add:
    • C&P Connect Alias
    • C&P Alias Contact Data
    Step 4d Fields

    Then Click on Save.

    Step 4e: Disable 'New Button' on following related lists

    'New Button' needs to be disabled for:

    • C&P Autoresponder Queue
    • C&P Autoresponder Sent Email Log
    Step 4e Disable New Button

    At ‘Contact Layout’, click on ‘Related Lists’ section --> then move to the respective Related List Properties

    Step 4e Related List Properties

    Click on the '+' button.

    Step 4e Click Expend Icon

    Uncheck the New Button, select the ‘Manage Payment Autoresponder Queue’ from Available Buttons and click on ‘Add’ so that it moves into Selected Buttons field.

    Step 4e Disable Standard Buttons

    Click on OK to save the settings
    Step 4e Click OK

    Step 4e Manage Payment Autoresponder

    Step 5: Settings for using Opportunity Products

    Within C&P settings we have an option called “Use Products for each item in an Opportunity".  Enable this option ONLY if you are using the Opportunity>Product model.  Most implementations do not use the Product model so this step may be skipped.

    This option is located under C&P Settings > Opportunity
    Step 5 Opportunity

    Read the statement under Opportunity Products to know which settings should be made to enable the Opportunity Products. Setup > App Setup > Customize > Opportunities > Settings. Click the checkbox to enable then click Save button.
    Step 5 Opportunity Settings

    Step 6: Update Setting on Opportunity Layout Page

    To add C&P Soft Credits to Opportunity Layout Page follow these instructions:
    Click on Opportunities tab then select and an Opportunity

    Step 6 Opportunities

    Then select Edit Layout
    Step 6 Edit Layout

    Step 6a: Place 'Fields' on Opportunity Detail Page

    At ‘Opportunity Layout' select 'Fields' section. There find
    • C&P Contact
    • C&P Order Number
    • C&P Payment Type
    • C&P Recurring ID
    • C&P SKU
    • C&P GL Account Number
    • C&P Class   
    • C&P Sub Class
    • C&P Invoice
    • C&P Tax
    • C&P Tax Deductible   
    • C&P Discount

    Click on SAVE.

    Step 6a Opportunity Layout


    Select following Related Lists,  then individually drag it into page layout.
    • C&P Allocations
    • C&P Opportunity Pledge
    • C&P Soft Credits
    Click on SAVE.
    Step 6a Related Lists

    Step 7: Site Creation

    Click & Pledge applications use a site for registration forms, invoices, autoresponder images, and more.  A single site is all that is needed for all applications.  There is no need to create multiple sites.  All applications use variables at the end of the URL to identify the form.

    To create a basic Force.com Site, you need to follow the following steps:
    • Register a domain name
    • Create a Force.com Site using the domain name
    User Interface
    The steps described below are based on the standard "Profile User Interface".  Set up the user interface to the Standard before proceeding with the listed steps:
    Setup > App Setup > Customize > User Interface >Setup > Uncheck the checkbox for the ‘Enable Enhanced Profile User Interface’ option.  You may revert back to the enhanced interface upon completion.
    Step 7 User Interface

    Registering a domain name

    In order to create your sites you must first register your Force.com domain name. This only has to be done once. You should choose a domain name that represents your organization rather than a specific site.

    Navigate to Setup > Develop > Sites and enter a domain name.

    It is best to enter your company or organization name since it is the basis for the site domain name.  For example if your website address is:  http://www.My-Company.com, use "My-Company" as the URL prefix to force.com as illustrated below:

    Step 7 Register Domain

    Creating a Site

    In Setup > Develop > Sites, click on the "New" button.  

    Step 7 Sites

    In "New Site" the following fields are important:
    • Site Label - The name of the site as it appears in the user interface.
    • Site Name - The name used when referencing the site in the Force.com API.
    • Site Contact - The user responsible for receiving site-related communications from site visitors and Salesforce.com.
    • Default Web Address - The unique Force.com URL for this site. Salesforce.com provides the first part of the URL; you must create the suffix using only alphanumeric characters.  We recommend using a generic name as this name will be used by all Click & Pledge products.  Using a name as "default" may serve this purpose.
    • Active - Activates the site.
    • Active Site Home Page - This points to the default Visualforce page to display when your site is active.
    • Clickjack Protection Level - Specifies the type of framing allowed. If same origin framing is selected, site pages can only be iframed by the other pages on the same domain name and protocol security (HTTP or HTTPS).    Allow framing by any page (no protection)
    • Salesforce feature note: http://docs.releasenotes.salesforce.com/en-gb/spring14/release-notes/rn_sitecom_clickjacking.htm

    Click on SAVE.


    New Site


    Public Access Settings

    Click on "default" (site label as set in the previous step) in the Develop > Sites

    Public Access Settings

    Click on the "Public Access Settings" button

    Site Defaults

    Click on the "View" link for the following Objects:
    • Contact
    • Opportunity
    At  "Field Level Security" > "Standard Field Level Security" set all fields as follows:

    Step 7 Field Level Security

    Enable all "Visible" fields in the "Contact" object

    Step 7 Default Profile

    Set as "Visible" all fields in the Opportunity object

    Step 7 Visable

    and for the "Standard Object Permissions" set the following permissions:

    Step 7 Standartd Object Permissions

    Personal Information Time Zone

    Prior to setting the Guest User's Time Zone make sure the time zone set in the "Personal Information" is correct.

    Personal Setup > My Personal Information > Personal Information > User Detail.


    Set Time Zone for Site

    Guest User's Time Zone

    In the Develop > Sites > Site Label (i.e. default) > Public Access Settings > View Users.


    Profile Detail

    Click on "Site Guest User, Default" under Full Name.


    Default site Guest User

    Click on the "Edit" button

    Edit Guess User

    In the "Locale Settings" set the site's Time Zone matching the "Personal Information" Time Zone and click SAVE.

    Default Site Guest User Time Zone

    Permission Set Assignments

    Click on "Edit Assignments" in the "Permission Set Assignments" section, at site guest user detail page.

    Personal Setup > My Personal Information > Personal Information > Permission Set Assignments.


    Edit Permissions

    Permission Sets:

    Enable the following permission sets.  Additional permission sets may be available and used as needed.  The following are essential for the proper implementation of the Event & Payment Management applications:
    • PS-CnP-Event-ONLY-SiteGuestUser
    • PS-CnP-PaaS-ONLY-SiteGuestUser
    Step 7 Enabled Permission Sets

    Step 8: Mail Chimp Integration

    Create a MailChimp account at https://login.mailchimp.com/signup?
    Login at MailChimp and create a List
    Lists
    Move to ‘C&P Broadcaster’ tab and click at ‘Account Settings’

    CAP Broadcaster
    1. Account Name : Name this whatever you wish. This is used for your internal reference.
    2. API Key: This number is located in your MailChimp Account. See below for instructions to find.
    3. Client ID: This number is located in your MailChimp Account. See below for instructions to find.
    4. Client Secret: This number is located in your MailChimp Account. See below for instructions to find.
    Once you enter the above information, click 'Authorize & Verify'.  Once Account is created it can be modified by clicking 'Edit'. Or deleted by clicking 'Del'.
    To find your MailChimp Account API Key information you need to:
    1.    Login to your MailChimp Account at < https://login.mailchimp.com >
    2.    Click at your Name at MailChimp > Account Settings  > Extras > Create a Key
    MailChimp Account

    API Keys
    Then you will get a API Key:
    Your API keys
    Copy and paste the same at C&P Broadcaster’s Account Settings page

    To find your MailChimp Client ID & Client Secret, information you need to:
    1.    Click at your Name at MailChimp > Account Settings  > Extras > Registered apps > Register An App
    John -Account Settings-Extras
    You will see following form
    Registered apps
    App name : Name this whatever you wish. This is used for your internal reference.
    Description : Name this whatever you wish. This is used for your internal reference.
    Company/Organization : Name this whatever you wish. This is used for your internal reference.
    App website : Name this whatever you wish. This is used for your internal reference.
    Upload a logo : Name this whatever you wish. This is used for your internal reference.

    Redirect URL : copy the Salesforce instance URL at the tab ‘C&P Broadcaster’ at the Salesforce account to be connected and replace the last part of the URL /Broadcast with the /verification
    Example:  https://cnp-paas.na11.visual.force.com/apex/Broadcast , then the required URL will be https://cnp-paas.na11.visual.force.com/apex/verification
    CAP Broaccaster URL

    Register an App
    After entering the information click at Create.
    After creating successfully you will get the both, ‘Client ID’ & ‘Client Secret’ at the same page
    Account-Edit Your App

    You need to copy and paste these to the C&P Broadcaster’s Account Settings page
    Once you enter the all the values (1.Account Name, 2.API Key, 3.Client ID & 4.Client Secret) then click 'Authorize & Verify'.
    CAP Broadcaster-MailChimp Settings

    In the process verifying when you click ‘Authorize & Verify’ you will get following page, there you need to enter the MailChimp account login details and click at Log In
    Connect CAP MailChimp

    At next screen you can see Success message as following, Click at Verification to verify

    Verification

    After verifying check the Status for ‘Authorized’ , then Copy the Remote Site Settings URL and Click at ‘Click here’ for creating the Remote Site

    Authorized

    When you click at , ‘Click here’ you will see following page. Click at 'New Remote Site'

    New Remote Site
    You will get the following form:
    Remote Site Edit
    Remote Site Name :  Name this whatever you wish. This is used for your internal reference.
    Remote Site URL : Paste the Remote Site URL, which you get after authorizing successfully
    Description: Name this whatever you wish. This is used for your internal reference.
    Active : Keep Active
    Then click Save button


    Report :: Version1.6

    $
    0
    0

    Swiper1 transactions are recorded in a local database. All recorded data will be available for future download and printing as long as they are not purged through the PRIVACY settings.

    To download reports click on the phone's options button and click on REPORTS in the displayed screen:


    Main Menu

    Transaction Summary Report

    Select the START and END date for the report. The displayed transactions may be printed individually or as one file.

    Transaction Summary Report

    Print option provides the following 2 reports:


    • Summary report: Similar to a cash register report, the printout shows a summary of all cards and totals grouped by the logged ID.
    • Detailed report: Individual transactions will be printed as a continuous report.
    • In addition to the printing option, detailed reports may be emailed to any email address using the phone's native email client. 
    Print Options

    Report Print Option

    Selecting individual transactions display the details of the transaction. The individual transaction may be printed using the Bluetooth printer.

    Report Print Option

    Report Email Option

    In addition to the printing option, detailed reports may be emailed to any email address using the phone's native email client. The email client needs to be setup already before using this feature. The report will be sent as an attachment with a default text in the body of the email. Additional notes may be added to the email using the email application.

    The following is a sample of an email generated by the Swiper1 application. A sample report is offered below for review:

    Sample report:  Swiper1_Report_20121103_141635.csv

    Report Email Option

    Processing :: Version3.1

    $
    0
    0

    Swiper1 Swiper 
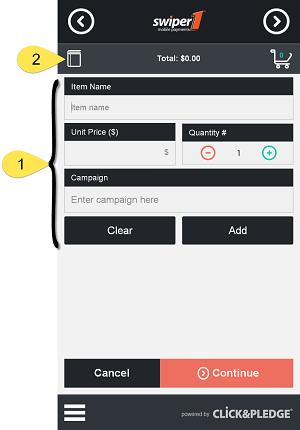
Swiper1 may be used with or without the Swiper.  Without the swiper the application provides an easy interface to manually process credit cards, email and / or print the receipt using an Android phone.  Using the Swiper, credit cards may be swiped and processed without requiring manual entry of the cardholder name, credit card, and CV2.  In either case, Email and CV2 are optional fields.

    Through integration with Salesforce, card holder first name and last name may be used to look up for possible matches in Salesforce.  All names matching the first and last name will be retrieved for review and if selected the transaction will be associated with the contact.  In the absence of a match the cardholder information will be posted to Salesforce and follow the matching options selected in the C&P Settings > Contact Matching selection.

    Swiper1 offers processing of payments for multiple items with optional tax and tax deductible portions.  The tax option may be enabled in the Settings area as they are disabled by default.

    New transaction screen

    New Transaction Screen
    Step 1: When you first login and go to the new transaction, you are directed to the cash register screen, where the item name, unit price, quantity, campaign will be given to add the item into the cart.

    Step 2: If the catalog is set up, you will see the icons on the upper left which will toggle between the cash register and the catalog. When on the cash register screen, the catalog icon will appear on the top and when on the catalog screen, the cash register icon will be visible. Clicking on the icon every time will switch the screen between the cash register and the catalog. The Screen below shows the catalog screen where you can select the items to add to the shopping cart.

    Store Manager Screen

    Additional Contribution Screen (optional)

    Additional payments may be added to the process by enabling it in the Settings area (Settings > Additional Options > Additional Payments). Additional payment identifying text may be customized through the Settings area as well as the displayed amounts. The displayed amounts may be set as fixed values, e.g. $5, $10, etc. or as percentages of the total basket total. Once set to a percentage of the total, each button will be dynamically calculated and displayed based on the preset percentages.

    Additional Contribution Screen

    Transaction Summary Screen

    The basket summary, as well as the additional payment and tax and deductible amount (if enabled), will be displayed for review.

    Transaction Summary Screen

    Questions and Terms (Optional)

    Questions and Terms may be set up in the Settings area (Settings > Additional Options > Questions and Terms). The questions will be displayed for the cardholder. All text areas are fully customizable. If set to mandatory in setting, until and unless, the mandatory questions (*) are answered, it won’t move to the next step. 

    Questions & Terms

    Payment Processing with optional Salesforce Contact Lookup

    Salesforce may be linked to the Swiper1 application through the Salesforce / Click & Pledge settings.  Clicking on the "Contacts Lookup in Salesforce" will retrieve the contact information for all contacts with the same first and last name. The contact information will lookup both Contact and the C&P Alias records.  Select the displayed contact to associate the payment to, or select "New Contact" to let C&P Salesforce application create a new contact record. The posted record will be saved and treated following the settings in the C&P Settings > Contact Matching setting.

    Salesforce Contact Lookup

    Payment Approval / Review

    Review the payment information and process the payment by clicking the "OK" button.

    Payment Approval

    Optional Card Holder Signature

    Card holder signature may be recorded (locally) and printed using the Bluetooth printer. The signature screen is an optional screen and may be enabled through the Settings area. The signature may also be collected for payments above a set limit, as set in the Settings area.

    NOTE:  The signature is NOT saved in the portal since the bitmap uses a large amount of network activity through the mobile phone. The signature is ONLY saved locally and once purged through the PRIVACY setting will NOT be available through the Click & Pledge portal reports.


    Signature

    Payment Approval

    Once the transaction has been processed, then the transaction status will be displayed. Receipts may be printed here or at a later time through the reports screen.

    Payment Approval
    Viewing all 251 articles
    Browse latest View live