API Information
References:
Support:Requirements:
- Gravity Forms requires a minimum of WordPress version 3.7+
- MySQL 5
- PHP 5
- Go to ‘plugins->Installed Plugins’ enable the ‘Gravity Forms Click & Pledge’

- Click on ‘Forms->Settings->C&P Payments’ to enter Click & Pledge Credentials like ‘Account ID’, ‘API Account GUID’ and to
setup other settings - Account ID, API GUID are located at the Connect > Launcher > Settings > API Information
![API Information]()
- Please follow the documentation here to create a form http://www.gravityhelp.com/documentation/page/New_Form

- Click on ‘Forms->Click & Pledge’ to display all available forms
- Select the ‘Gravity Form’ to process then click on ‘Save’ button
The settings which are made in this section will affect to the total gravity forms. To change the settings, follow the below steps:
- Login to Gravity Forms and click ‘Forms’.
- Click ‘Settings’.
- Select ‘Click & Pledge’.
NOTE: Detailed information is given under every field to follow.

Adding C&P Order Mode to the Form

‘C&P Order Mode’ button is available in the ‘Pricing Fields’ section. Double click or drag and drop the button to add it
Setting SKU for a Product

NOTE: In the above example the Field id for the item is shown
Add a hidden field:


- fid = Field ID of the product as listed in the Product listing
- value = Option's value- each option of a product has to be set up with a unique value and that value needs to be listed to identify the SKU's reference.


Connect Campaign URL Alias field can be added to the form so that the transacted amount will be added to the selected campaign. By entering the Connect Campaign URL Alias in the Form, the receipt assigned to the Connect Campaign will replace the generic receipt.
To know the Connect Campaign URL Alias, login to Connect platform (https://login.connect.clickandpledge.com) > Launcher > Fundraising > Campaigns > Select the desired campaign > Campaign Details > Campaign Settings > Basic Information > Campaign Alias.

To add the Connect Campaign URL Alias to the form, follow the below steps:
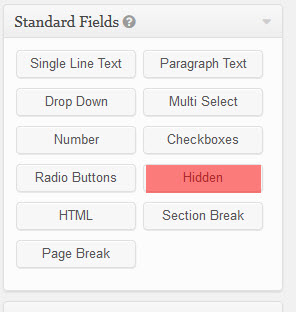
Step 1: From ‘Standard Fields’ section, Drag and drop the ‘Hidden’ field into the Form Editor.
Step 2: Enter “{CONNECT_CAMPAIGN_URL_ALIAS}” in the ‘Field Label’.

Step 3: Enter the Connect Campaign URL Alias as the Default Value.

Click ‘Update Form’ to save the changes.
NOTE: If there are two or more Connect Campaign URL Alias in the form then the highest field ID will take into consideration. For example, if there are two Connect Campaign URL Alias with Field IDs 8 and 9, then the campaign which is in the ‘Hidden: Field ID 9’ will be considered.
Custom Questions
The following fields are posted as custom questions:
- Single Line Text
- Drop Down
- Number
- Radio Buttons
- Paragraph Text
- Multi Select
- Checkboxes
- Hidden
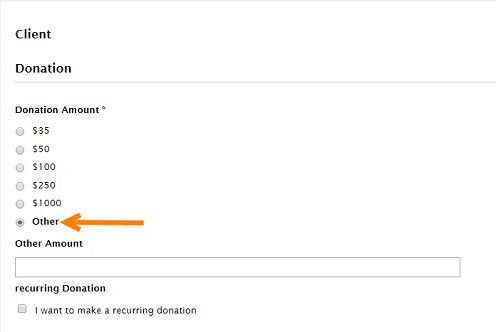
In the Donation page, If you are going to select the option “Other”, then please make sure to change these settings in the “Form Editor” page.
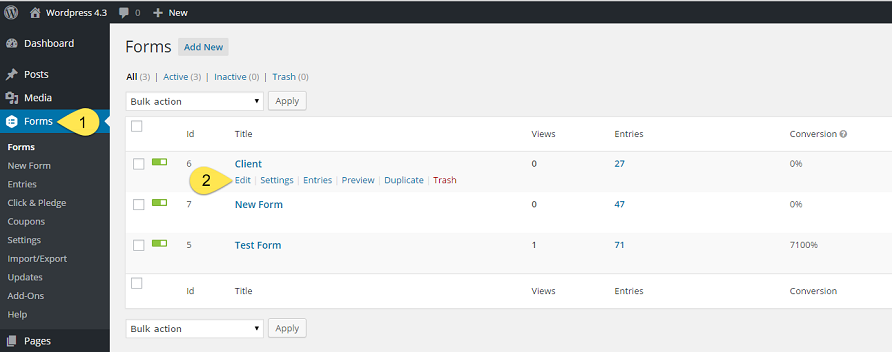
Step 1: Click on “Forms”.
Step 2: Select the Form name and click on “Edit”. It will redirect to the below screen.
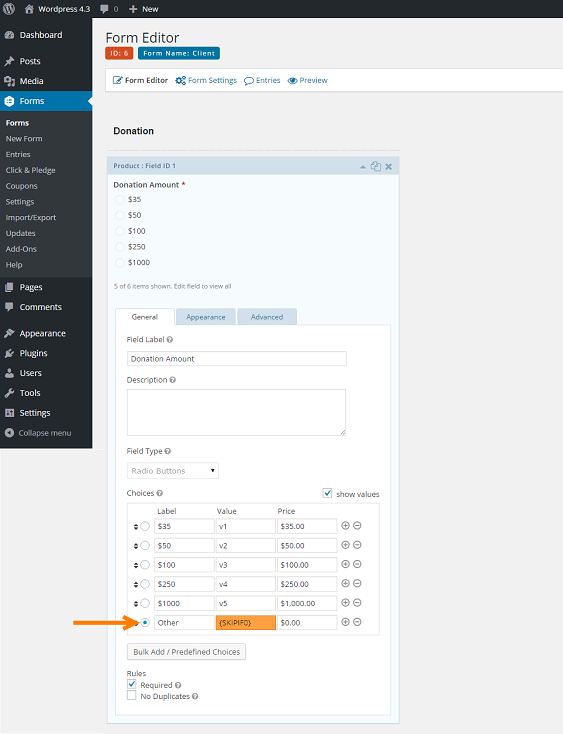
For the Label “Other”, change the Value to “{SKIPIF0}” so that it won’t post duplicate items to Salesforce Opportunity Object.
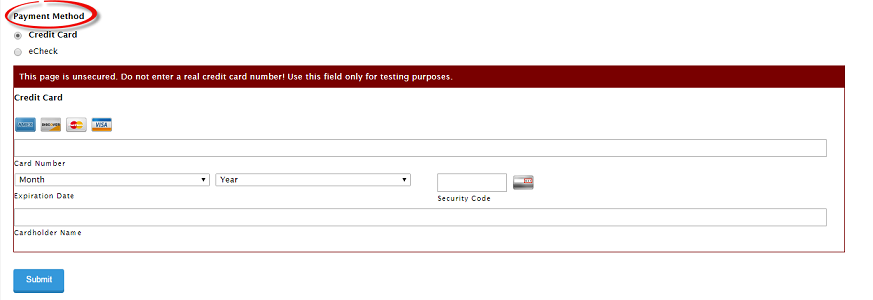
Label for Payment method when Payment methods are set to Conditional Logic
If there are multiple options for payment methods and they are displaying with conditional logic, then the label should be one among these three:-
- Payment Method
- Select Payment Type
- Select Payment Method
How to Build a Gravity Form with Recurring & One-Time Options

Single/Double click on

1. Field Label: Enter the Label of the form field. This is the field title the user will see when filling out the form.
2. Description: Enter the description for the form field. This will be displayed for the user and provide some direction on how the field should be filled out or selected.
3. The name mentioned here for the payment methods will be displayed in the external page.
4. By enabling the checkbox for “One time only”, the user can select either “One time only” or “Recurring” from the external page. If not selected, the user can perform
5. Default Payment Options: The option which is selected here will be displayed as a default option in the external page.
6. The name mentioned here for the recurring types will be displayed in the external page.
7. Select either installment or subscription or both. The selected options will be displayed in the external page.
8. Default Recurring Type: The selected option will be displayed as the default recurring type in the external page.
NOTE: If both the options are selected in the step: 7, then only “Default Recurring Type” will appear.
9. The name mentioned here for the periodicity will be displayed in the external page.
10. The checkboxes which are selected will be displayed in the external page. SKU Suffixes allow you to create additional parameters to increase the flexibility of information included in a SKU. This is particularly helpful with Salesforce mapping.
11. The name mentioned here for the number of payments will be displayed in the external page.
12. Indefinite Only: If this option is selected then 998 times for installments and 999 times for subscription, the recurring option will be continued.
Open Field Only: If this option is selected, “Default number of payments” and “Maximum number of installments” can be given. The entries given here can be changed in the external page.
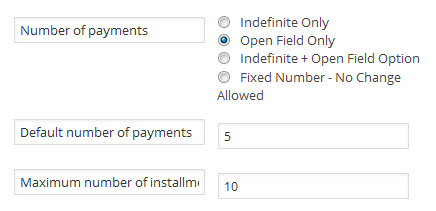
Indefinite + Open Field Only: If this option is selected, the default value will be 999 which can be changed accordingly in the external page.
NOTE: Make sure the range for installment is 2 to 998 and 2 to 999 for a subscription.
Fixed Number: If this option is selected, the number entered in this field remains constant.
13. Rules: Select the option to make the form field required. A required field will prevent the form from being submitted if it is not filled out or selected.
A recurring transaction can be done through Credit Card and eCheck. Here are the steps to add Credit Card and eCheck into the form editor.
Credit Card and eCheck can be added from Pricing Fields. Single/Double click on the button so that they will be added to the form editor.
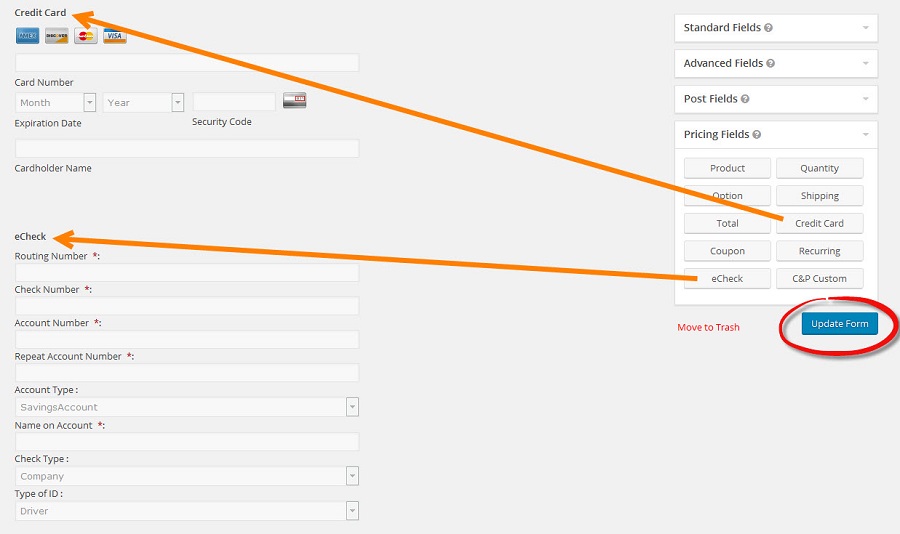
After adding all the required fields to the form editor, click on Update Form. The external page for above fields will look like this:

NOTE 1: If the plug-in is updated then the already existing forms will also be updated without any change in the settings which are already set for the form.
NOTE 2: If the settings want to be changed for Recurring process then delete the field and click on “Update form” button. Then select the recurring field from Pricing Fields tab.
Setting Campaign for a Product
NOTE: These steps are applicable only from Version 3.x and above.
Campaign feature provides a flexible method for tracking donations across different channels. The following steps clearly explain how to add a campaign to the product.
Step 1: Add the product to the form editor.
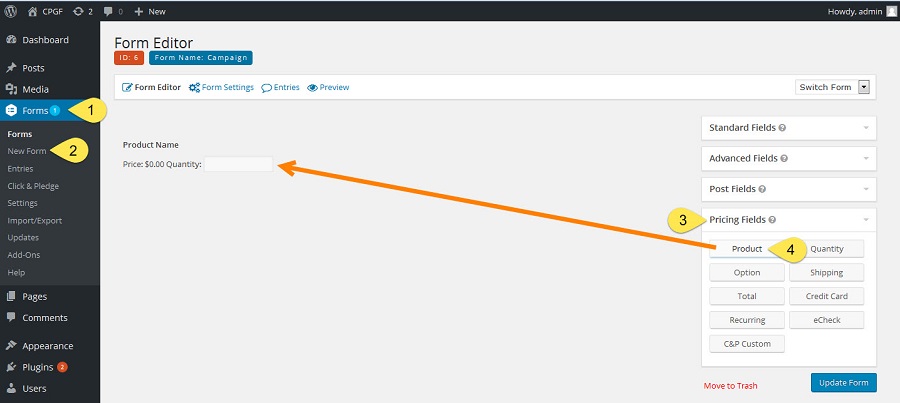
1. After login to the Gravity Forms, click on Form.
2. Select New Form and provide the forum name and description.
3. Click on Pricing Fields, so that the options will appear.
4. Click or drag the Product button so that it will appear in the form editor.
Step 2: Add the Campaign to the form editor.
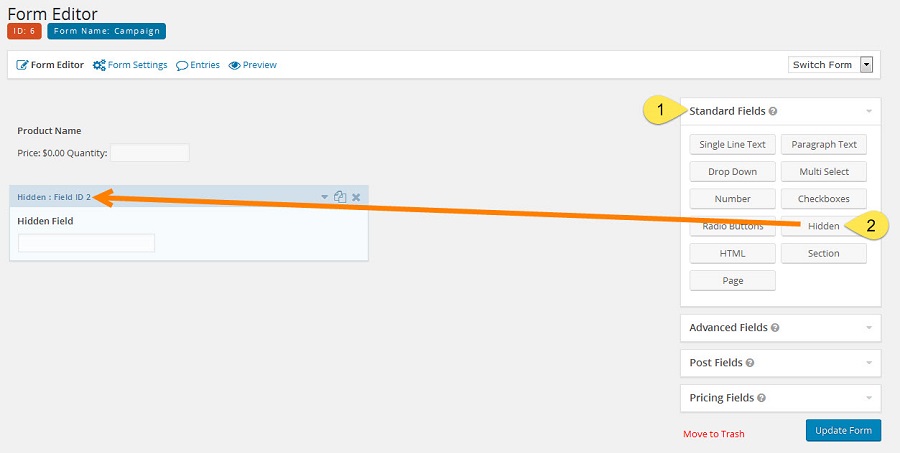
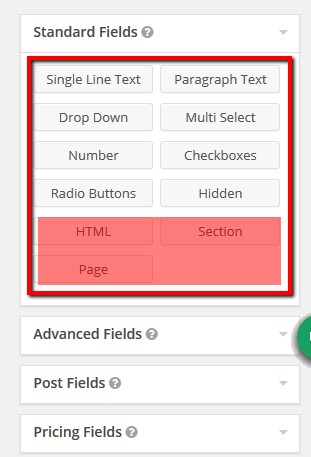
1. Click on Standard Fields, so that the options will appear.
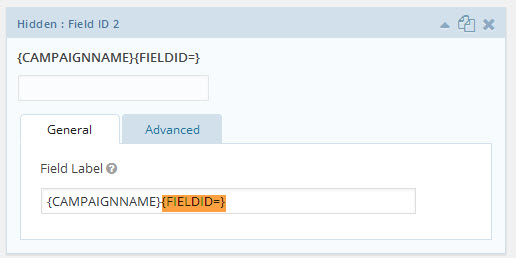
2. Single/Double click on Hidden button so that it will appear in the form editor. Click on Hidden Field so that the Field Label column will be visible.
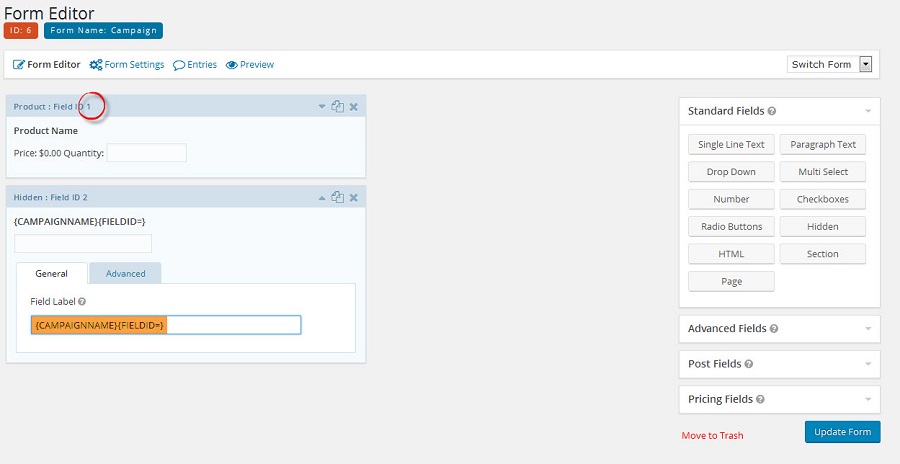
3. Replace the Field Label with {CAMPAIGNNAME}{FIELDID=} or {CAMPAIGNNAME}{FIELDID=1}.
Campaigns are of two types. They are Transaction Campaign and Item Campaign.
Transaction Campaign:
Transaction Campaign will have Empty Field id.
Eg: - {CAMPAIGNNAME}{FIELDID=}
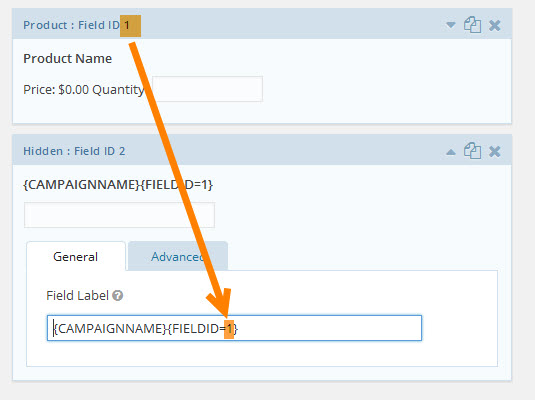
Item Campaign:
Item campaign has the Product Field Id number instead of null.
Campaign Name:
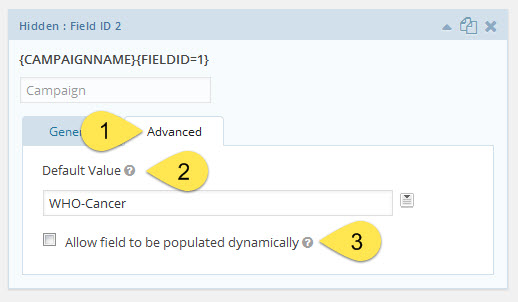
1. Click on Advanced button.
2. Default Value: If you would like to pre-populate the value of a field, enter it here.
3. Check this option to enable data to be passed to the form and pre-populate this field dynamically. Data can be passed via Query Strings, Shortcode and/or Hooks.
Example: 1
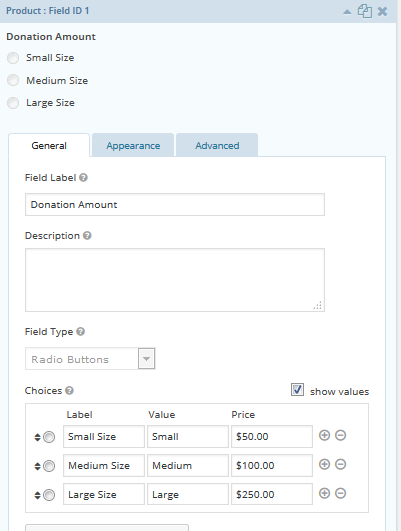
For products with options such as those listed in a pull-down menu or a radio button, each option needs to be set up with a Campaign. Campaigns may be the same or different.
Hidden field format: {CAMPAIGNNAME}{FIELDID=FID}{OPTION=VALUE}
- fid = Field ID of the product as listed in the Product listing
- value = Option's value- each option of a product has to be set up with a unique value and that value needs to be listed to identify the Campaign's reference.

Option: SMALL
The field label: Reference the Field ID of the item as shown in the item's blue label area.

& the Campaign value as set in the Advanced tab. Campaign = WHO-Cancer-Small

Option: Medium

& the Campaign value as set in the Advanced tab. Campaign = WHO-Cancer-Medium

Option: Large

& the Campaign value as set in the Advanced tab. Campaign = WHO-Cancer-Large

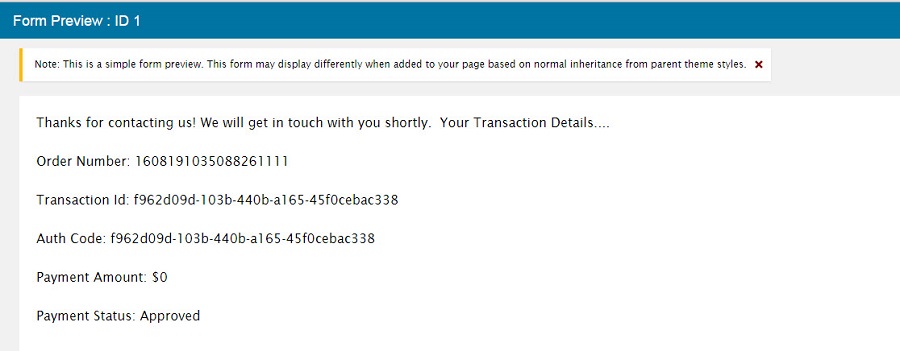
Addition of various parameters in the Thank You page
To add various parameters like order number, transaction Id, Auth Code, Payment Amount and Payment status in Gravity Forms Thank
Go to Gravity Form > Forms

After selecting Confirmation, click on Edit.
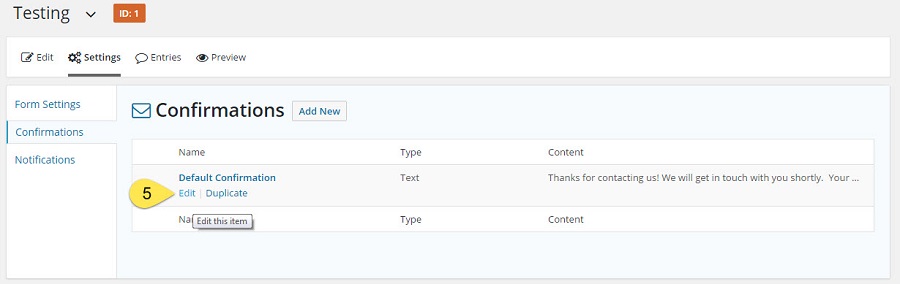
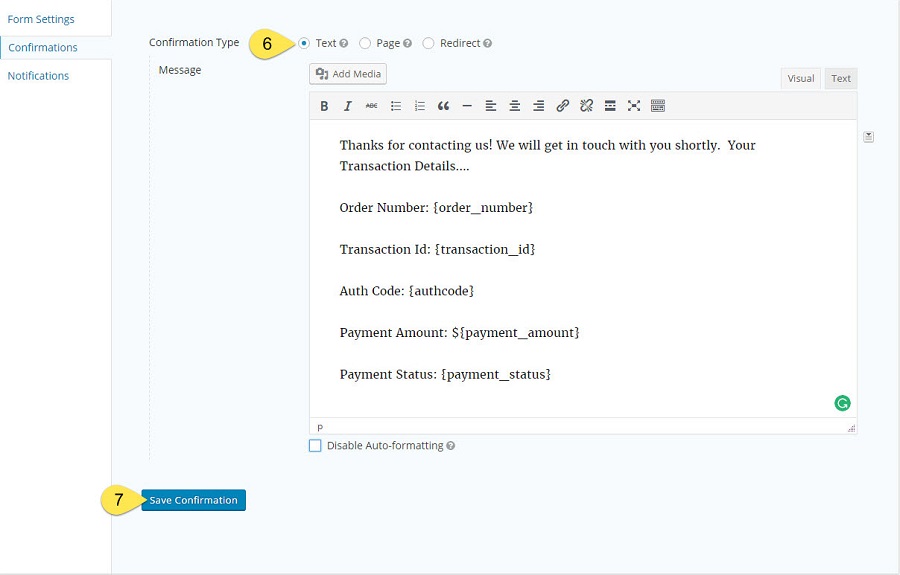
You may edit the confirmation page and customize the page as needed. The following parameters are present by default:
Transaction details:
Order Number: {order_number}
Transaction Id / VaultGUID: {transaction_id}
Authorization Code: {authcode}
Payment Amount: ${payment_amount}
Payment Status: {payment_status}
After successful transaction, Thank you page will appear like below: